I am on a mission... to create, to inspire, to learn, to educate, to save, to grow, to be better... Join me :)

Sunday, November 11, 2012

Cream cheese coffee cake and the Putz factor...

I ran across this coffee cake recipe on my favorite recipe site this morning when I was looking for something to make for my family. I originally wanted to make french toast but I was low on eggs and milk so off I went looking for something else...

Here is a link to the original recipe... polish cream cheese coffee cake

This is really good! My family loved it but I will not make it often because its a bit Putzy to make.

That being said I'm starting something new here at Back to Basics Mom... The Putz factor. What is the Putz factor you may ask? Well whenever a recipe takes a long time, uses lots of tools and dishes to make and is messy thats Putzy. I will have a scale of 1 to 5. 1 being not bad and 5, be prepared to be in the kitchen a while and it will look like your kitchen exploded when you are done. From here on out all recipes I post will have a putz factor rating :)

Here is my printable version with my changes cream cheese coffee cake

Putz factor 4 out of 5   (this was the first time I made this so there was a learning curve. I'm guessing next time it will be closer to a 3 but still takes time and makes many dirty dishes!)

My tips step by step:

Cream Cheese Coffee Cake

1 cup white sugar
1/2 cup butter
1 egg
1 cup sour cream
1 teaspoon vanilla extract
3 cups all-purpose flour
1 teaspoon baking soda
1 teaspoon baking powder

Filling:
2 (8 ounce) packages cream cheese,
softened
1/2 cup white sugar
1 egg
Topping:
1/2 cup brown sugar
1/3 cup all-purpose flour
1/4 cup butter
1 Teaspoon Cinnamon

Directions

First let me say that I got all 3 of my mixtures mixed and ready before I began assembly and that is what I recommend.
 
1. Preheat oven to 350 degrees F (175 degrees C). Grease a 9x13-inch baking dish. (I used butter)
2. Beat 1 cup white sugar, 1/2 cup butter, and 1 egg in a bowl until smooth. Add sour cream and vanilla extract; mix well. Stir in 3 cups flour, baking soda, and baking powder until mixture comes together in a sticky dough. Spread half the dough evenly into prepared baking dish. This is where this gets tricky! This dough is sticky! I would drop the dough by spoonfuls to mostly cover the bottom (still only using half the dough or just a tad bit more) Then I used a piece of parchment paper to cover the dough and then either using your fingers or a small dough roller smooth out the dough so it covers the bottom of the pan. Remove the Parchment!
3. Beat cream cheese, 1/2 cup white sugar, and 1 egg in another bowl until smooth. Spoon mixture into baking dish over dough. Drop remaining half of dough by spoonfuls over cream cheese mixture.
4. Mix brown sugar, 1/3 cup flour, and 1/4 cup butter and cinnamon in a bowl until mixture resembles a coarse crumble; sprinkle over dough. I tried to fill in any open spaces and make it as even as possible.
5. Bake in the preheated oven until the center looks set and top is golden brown about 30-40 minutes.


YUM!

I served this with bacon and some fresh fruit to round it out. This is definitely a decadent breakfast and would be a winner at any breakfast or brunch get together.

Thursday, October 25, 2012

A whole lot of Breakfast Burritos

I Love Breakfast Burritos! I have since my single days when McDonalds first started serving them and for me they were the best cure for a lat night out on the town. Now as a busy wife and mom they have become a great way to start the day for my busy family.

Today I kept track of how I make them.
Printable recipe

I used:
1 pound of breakfast sausage (I got mine at Aldi)
1 onion diced
1 bell pepper diced
18 eggs
1 cup of milk
1 cup of shredded Cheddar cheese
salt
pepper
American cheese slices 12-24 depending on how much cheese you like
24 10 inch flour tortillas

Using a large nonstick skillet Cook and finely crumble the sausage. Add the diced onion. cook for a few minutes till it starts to soften. Add the diced bell pepper cook until it begins to soften a bit.

Whisk eggs and milk together well. Add to the sausage mixture. Add shredded cheese and stir it all around. Add salt and pepper to taste, but go easy on the salt because the cheese will add saltiness. Cover and cook on low stirring occasionally to get nice fluffy eggs and a nice scramble.

When the eggs are cooked I let everything cool a bit. Warm the tortillas in the microwave for 20-30 seconds to help them be soft and pliable. lay 1/2 to one whole slice of cheese on a tortilla closes to the edge toward you. Put 1/2 - 2/3 cup of egg mixture on top of cheese. Roll the tortilla starting with the edge closest to you by folding up from the bottom, fold over the left and right side then continue to roll. Wrap tightly with plastic wrap and store in a zip top freezer bag. continue until all are rolled.

There are two ways to reheat your Burritos.
Quick method: unwrap and  microwave for 1 minute at half power. Warm a bit more if you need to.

Oven method: (My husband's personal favorite) Unwrap and place Burritos on a baking sheet. (for easier clean up lay down a sheet of Parchment paper or use your silpat mat. cover with your favorite cheese and bake at 350 for 20 - 30 minutes or until burritos are warmed through. if you do not like your cheese crispy bake for 25 minutes with out the cheese and only add the cheese at the end until it is melted.

Yield 20-24 burritos

I forgot to take production pictures because frankly I was super hungry and I just wanted to finish so I could sit down and eat some :)

Here is one bag of the finished product. (I have 3 bags total now that I am done)


Monday, October 1, 2012

Farm fresh Chickens...

I have been ordering roasting chickens from a local farm for about a year. They are a great value for pastured chickens. The family is great to work with and the chickens are well Delicious!

All that being said I'm glad it will be a few months (probably 6) before I will be able to get more. I still have 6 whole in the freezer from the batch I got in August and yesterday I picked up 8 from the last batch for the year. This batch I decided to cut up before freezing (I need the room in the freezer but more on that in a bit). I am getting much more proficient at cutting the chickens apart but it is still a bit of work. I finally finished cutting about 8:30 PM last night (picked them up at 4 and ate dinner somewhere in there too). Today I portioned all the pieces out and vacuum sealed them. I also de-boned the breasts and cut 4 into thinner fillets and coated them with crushed corn flakes and some seasonings and froze them so they will be already for a quick dinner.I thought about adding marinade to some of the chicken but could not make up my mind so I just went with plain for now.

I saved all the bones and Carcases and boiled them for broth / stock. I now have 5-6 quarts to freeze in smaller serving sizes. I will be working on that tomorrow.

I still need to do a bit more freezer organizing as I will have another beef Quarter coming in a week or so. Last year meat from the same farm took up a good 2 shelves in my 13 Cu/ Ft stand up freezer. Oh I forgot to mention I just got a beef 1/4 from the farm that I get my chickens from. At least theirs is a smaller breed (Scottish Highland) so it barely took up one shelf. Yummy steaks by the way!

Now what's for dinner tomorrow? No idea... LOL... but at least I have options again :)

Thursday, September 6, 2012

Easy Peasy School Lunch ideas

Ok so in my community there has been lots of talk and work to improve our lacking school lunches. "The Boy" would get school lunch almost every day just because he just likes to get lunch at school but does not always eat it all. "The Girl" is the opposite but is liking the salad bar at her new school. Most days they bring lunch from home. Yes I do pack it for them in the morning but you could pack it the night before or do enough for the week on Sunday evening. Here are some ideas...

(EDIT January 2014)  Our School lunches have improved a lot since my original post. Is there still room for improvement? Yes, but now my kids eat school lunch more often than not. Partly because I am working part time now and also because it is a choice we have made. I am leaving these ides here in hopes to help other moms who are struggling with choices :)

Sandwiches... OK this is a no brainer but "think outside the bread" :)
Meat and cheese roll-ups... roll favorite lunch meat with cheese and secure with a toothpick
Meat and cheese cut into shapes... I don't have the time and patience for this but some kids love it and it helps them be more adventurous.
Crackers ... add with cheese and meat and you have home made Lunchables!
Leftovers... anything that can be eaten cold, IE: Pizza
Frozen grapes... My kids LOVE these. I buy lots when they are on sale wash take off the vine and freeze.
Home made muffins ... freeze them! they will be perfectly defrosted by lunch :)
Freeze yogurt cups  ... this was a revelation to me! My kids love it and it's like they get ice cream with lunch! You can freeze the individual cups from the store or buy the big tubs and make your own.
Apple sauce ... make your own and freeze like the yogurt! Or buy the super size jug at the store and portion it out into your own containers.
Cut / wedged Apples ...  There are a few ways to keep them from browning... drizzle any citrus soda you have over them. I have been using a lemon lime soda from Aldi it's about .89 for 1 liter. Or wedge then wrap tightly back into it's shape with a rubber band or plastic wrap. The surfaces won't be exposed so the sugar will not oxidize as fast turning it brown. Use less sweet varieties, they brown slower!

 I will be adding more to the list but this is a start.

I also want you to know that I used to only think I could put pre packaged snacks and goodies in my kids lunch. It is only over the last few years I have begun to get more creative with their lunches.

See my all about lunch page for some pics of my kids lunches

Wednesday, July 11, 2012

Mini Chicken Pot Pies...

A while ago I made a ton of pot pie filling and after making 2 large pies still had dough and filling left so I decided to try making Mini's and freeze them to cooking later.

Please disregard my awful looking muffin tin, yes it has seen better days but I think it's at least 15 years old and has seen a lot of use :)


I lined my muffin tin with my silicone baking cups just to make my life easier later. Froze them solid then placed the frozen mini pies into a zip-lock bag. 

Yesterday I decided I wanted the kids to have something other than PB&J for lunch so I baked these up. 

The verdict... Awesome! The kids really liked them and if you let them cool a bit you can eat them with your fingers. I baked them at 350 for about 25 minutes.

No I know you are probably looking for a recipe after me posting all this but I have a confession... I never make my pot pie the same way twice. I can give you an idea of what I put in it but thats the best I have for now :)

Chicken Pot Pie filling
Pie crust for a 8-9 inch 2 crust pie Here are links to some I have used and liked or you can use store bought. buttermilk pie crust   Perfect Pie Crust courtesy of PW
Diced Cooked chicken, 2-3 breasts worth
Assorted vegetables (whatever you like)
     Corn, onion, peas, potatoes cubed or diced fine.
1 can / serving of cream of something soup (chicken, garlic or onion are great) Store bought is fine or home made if you have it. Here is a basic recipe.
Salt 
Pepper
assorted dried herbs up to a teaspoon or 2, I have a rosemary blend I like.
milk or cream to thin out the mixture about 3/4 cup

Mix everything together in a bowl

For large pie ...Line your pie dish with bottom crust, add filling, add a bit of water with fingertips to rim of crust add top crust. finish edge of crust with your preferred method. I like to flute the edge with mu fingers. Bake at 350 for 45-60 minutes.

For mini pies use a large biscuit cutter (about 3") and put dough circle into muffin tin. Fill tin 3/4 of the way with chicken mixture. cover with a smaller disk of dough. (A set of cutters like these come in handy I have This exact set )

I totally winged these directions, like I said I never do it the same way twice. Luckily pot pies are pretty forgiving and if you do not add enough seasoning a bit of salt works great at perking it up.

Have fun!

Saturday, July 7, 2012

Mission accomplished, and a new venture :)

Today I finally delivered the sewing project I have been working on for a while. It feels so god to have it completed and the look on the recipients face was priceless. I was so pleased and honored to do this for her family!

My project was to create 3 wall hanging quilts from the recipients deceased husbands clothing. The top 2 are to be given as gifts to her children on the 1st anniversary of his death. 

Here are the finished products...

This 1st one is for her son.
This one is for her daughter

This one is for the lovely lady who commissioned me to make these. I actually added 2 more photos after this picture was taken but did not get a chance to take another photo before I had to deliver it.

This was a learning experience for me even thought I have made lots of quilts in all shapes and sizes. I had never worked with knits (T-shirt & sweatshirt fabric) in a quilt before and it definitely adds a bit of a challenge. Also new for me was using the photo fabric. I think they really add a wonderful element of nostalgia to the quilts.

So since this went so well and I really loved doing this so If you or someone you know would like a custom memory quilt made for yourself or a loved one please let me know!

Prices vary depending on size, fabric, amount of quilting and if you want photos on the quilt.

Email me at B2BMomBlog@gmail.com for an estimate :)

Thanks for looking!

Friday, July 6, 2012

10 minute home made strawberry ice cream without an icream maker!

So I was reading one of my Favorite Blogs the other day and she had posted about this "5 minute berry ice cream without an ice cream maker". I thought "hmmm I'm going to have to try that one day." One of the ingredients was heavy cream which I almost never purchase so I just added it to my "to try someday" file and forgot about it.

 A few days later I went to a local food distribution program and got all this heavy cream as part of a package deal.


So I decided to give the ice cream recipe a whirl!

I hauled out my trusty food processor (thank you swagbucks for helping me purchase this awesome kitchen tool!) 
I adapted This recipe a bit to make it easier for me and accommodate what I had available.

10 minute Strawberry Ice cream
Here is the Printable recipe

Ingredients:
4 cups frozen Strawberries, sliced, halved or quartered
1/2 - 3/4 cup of white sugar (adjust to your personal taste)
1/2 pint heavy cream (the cute tiny container)

Directions:
Add strawberries to your food processor.
Pour sugar over the berries.
Disclaimer: My pictures are not great for this post as I was impatient and it was super hot outside and I wanted to get this done and in the freezer ASAP! Also please ignore the weird stains on my very old counter tops. I have tried everything to remove them and they will not come off.

Pulse until the sugar and berries are mixed well and crushed pretty fine.

Slowly add in cream through the opening in the food processor. 
This part can get a bit frustrating if your processor is a smaller model like mine (it's and 8 cup vs. 12)  but if you take off the top and carefully move things around a bit with a wooden spoon (if you use a spatula you may cut it on the blade and if you use a spoon you could damage your blade) you will be all set. Turn on again and let it run until everything comes together. It will look all nice and slushy.
At this point you can put it in a container and freeze it so it gets nice and hard or you can serve it right away to you salivating children. I did both :)
This is what it looked like served right away
This stuff is AMAZING! I will say that I much preferred it after it had frozen solid. It scoops just like ice cream should and had a much nicer flavor I think after it had been in the freezer for 24 hours.

After serving this your family will definitely think you are the awesomest (yes it's a word, well today it is anyway) person in the whole universe!

If you find that you are getting lots of ice crystals next time stir your freezer mixture every 1/2 hour for a couple hours. It will help break them up.

Thursday, July 5, 2012

Fresh Picked Strawberries!

So last week the kids and I went out to a local farm to pick strawberries. I was super happy find a place that still had berries available because most of the local farms were already picked out. I had meant to go the week before but I was knocked out by one of the nastiest bugs I have ever had.

It  took us about an hour to pick all this...

I think the boy ate at least a pint and he definitely ate more than he picked. The girl did well picking, a bonus of her growing up a bit but she ate quite a few in the field too :) It was a gorgeous day and we had a blast.

The best part to me about this whole venture was that the kids did all the hulling!


Wahoo!

Yay me!

Thanks kids!


I then made approximately 20 pints of freezer jam... Phew what a day! Last year I managed to stretch the jam out all the way to the end of the school year. Hopefully I can do that again because the kids really love it. Last year I tried 3 different recipes and below is our favorite.

My Freezer Jam recipe. Here is the printable Strawberry Freezer Jam

4 cups of crushed strawberries
1 package of no/low sugar pectin
1/2 cup of honey (local is best)
1 1/2 cups sugar (next time I will try even less sugar)
1/4 cup water

Whir up your berries in a food processor or blender, then put into a heat safe bowl.
Add 2 Tablespoons of Pectin to the berry mixture.
Add rest of pectin to a medium saucepan with the sugar, honey and water. Bring to a boil for 1 minute. You just want to heat it up and get everything blended. Turn off heat and add sugar mixture to berries. Mix well to blend ingredients.
Pour into prepared containers. Let cool for a few minutes before adding lids. I let mine cool completely before I put them into the freezer.


I forgot to take a picture of my pile of finished jam but the bottom of my 10CU ft freezer is FULL!

The jam did not use up all our berries. I filled 2 trays of sliced berries to freeze (what I used for ice cream (recipe to come). We also ate lots with vanilla yogurt or put them on top of vanilla  ice cream. They were so huge and delicious it was well worth the work and effort!

Wednesday, July 4, 2012

Home made butter... mmmm

So I got a ton of Heavy cream as part of a food distribution program I went to... Hmmm now what?
Then I remembered a friend telling me she made butter last time she got a bunch of cream so I said to myself OK, I can do this!

There are lots of instructions online and luckily I have my trusty KitchenAid so I knew I could handle it. Still it's a bit daunting... I mean we don't make butter we buy it right? OK I'm over it lets give it a go :)

This was my favorite tutorial that I found homemade butter from The Hungry Mouse

Here are some pictures from my adventure...
 This is what it looks like after about 10 minutes and the nice fluffy whip cream is starting to break down.


Things go pretty quickly now and it gets clumpy looking.

 Now its ready for straining...


 This is after I have strained, kneaded, and rinsed out all the buttermilk. Sorry there are no in between pictures because my hands were covered in butter :) As an extra step I put the disc of butter into some sack cloth (you could probably use cheese cloth too) and folded it over and pressed to expel any remaining buttermilk. I also did mix in a bit of salt. Probably about 1/4 of a teaspoon.


 Mmmmm...


From 1 quart of cream I got 1 3/4 cup butter and over a cup of buttermilk we will use for pancakes or baking. I measured 1 cup into my handy dandy measure all cup and have a nicely measures cylinder to go into the freezer and wait until I need some butter for baking. If the heat ever breaks I will make some muffins and cookies .

So the ingredients I used were...
1 quart of heavy cream
1/4 teaspoon salt

handy tools:
A good stand mixer
a fine mesh strainer
flour sack cloth ( cheese cloth would probably work too)

Tuesday, July 3, 2012

How I've missed you!

So sorry for the huge gap in posts. Life has been crazy busy and I admit I just have not made the time to sit down and post what I have been up to. I am hoping to make up for it over the next few days and weeks. I have had some successes and failures in the kitchen and in the sewing dept.

What have I been up to you ask?

In May I was overwhelmed with... end of the school year activities & end of the year Girl scout activities including court of awards where my girls bridged to Cadette scouts. I just want to take a minute and say how amazing these 11 girls  are to me. Seems like yesterday they were in 1st grade and we were all getting to know each other. My how time flies!

The first 2 weekends in June I had outings with my Girl Scouts (the Zoo sleepover was AMAZING!!!) Also we had 2 scout events within our town that I helped organize. I have been running my almost 11 year old to drama camp and performances 2-3 times a week. Then I have been working on a sewing project that is due in a few days. I was commissioned to do 3 memory quilt wall hangings. This was a new type of project for me (even though I have done LOTS of quilts) It had its own particular challenges. All I have left to do is sew on the dedication and care tags and they are done!

Wednesday, May 9, 2012

A food obsession ?

Are you ever jonesing for a flavor and as you are making it or even thinking about it you feel like you can absolutely not wait to sink your teeth in. I mean your (my) kids could be screaming, the dishwasher overflowing, dog barking and all you can think about is savoring the numminess that is about to come. Then you get a glimpse of yourself and realize you may have a problem. Um yeah that's me... Hi I'm Paulette and I'm addicted to Avocados :)


I made this avocado chicken salad today and it definitely hit the spot. I hope you enjoy it as well!

Avocado chicken salad

Ingredients:
1 ripe Avocado
1 small chicken breast cooked & diced
1/2 lime juiced
1/4 cup finely diced red onion (about 1/3rd of a baseball sized onion)
1 tablespoon diced cilantro or to taste
salt to taste

Cut, peel and mash the avocado how to cut &peel avocados ( I do it slightly different but there are good tips here)
Dice cooked chicken & Onion & add to avocado mixture.
Add lime juice from 1/2 of a lime.
Add diced Cilantro and salt to taste.
Mix well

Serve on your favorite bread, croissant or in a wrap. Or you can be weird like me and eat it with tortilla chips :) or if you like just sit and eat it with a fork! Enjoy!

Sunday, April 29, 2012

Delightfully sinful snack, well... maybee not so sinful :)

So most of my friends know that I am a big time Aldi shopper. Over the past few weeks they have had great strawberries at a great price ($1.19 per Pound). Now, strawberries are not my favorite to just eat by themselves due to their slightly tart nature but I found a solution! I made a few variations on a cream cheese dip for them.

Version 1 (not the healthiest)
2 ounces of 1/3 lees fat creme cheesed
2-3 Tablespoons of powdered sugar or to taste
1/4 Teaspoon vanilla

Warm Cream cheese for 10-20 seconds in Microwave or until spreadable but not hot. Mix in powdered sugar and vanilla.

Wash 5-6 strawberries, cut off tops and cube or slice berries.

Layer berries and cream cheese mixture into a bowl. Enjoy!


Version 2 (slightly healthier version)
1 ounce cream cheese
1/3 cup vanilla yogurt

Warm Cream cheese slightly and whisk with yogurt. Layer with washed berries.

Version 3 The healthiest way to go...
Layer washed berries with vanilla yogurt :)

want to make it even better?

Add some sliced banana and drizzle some warmed Nutella on top MMM....


I was amazed how full I was after eating this.
If you really love a cheesecake type flavor version 1 is for you. I like that and version 2 VERY much!

Considering I have a serious sweet tooth I was really happy with this snack. I tried not to "drown" the berries in the creme so I would not counteract all the strawberry goodness.

How will you treat yourself this week?

Wednesday, April 25, 2012

Orange Chicken

Do you love Chinese food? My family does but between the expense and the MSG it is not something we indulge in very often. So I was super excited to make this Orange Chicken this week. It hit the spot and I was in heaven while eating this! If you like oriental food this is definitely for you. I must say this rivaled any Oriental restaurant food I have ever had! My one Best part was everyone LOVED it :)

Sorry I do not have a Picture to share. It was a super busy night and I just needed to get everyone fed.

Here is the Printable: Asian Orange Chicken

Ingredients:
1 1/2 cups water
2 tablespoons orange juice (I had Cuties on hand. I zested 1 used 3 for the juice)
1/4 cup lemon or lime juice (I used lime)
2 1/2 tablespoons soy sauce
1 tablespoon grated orange zest
1 cup packed brown sugar
1/2 teaspoon minced fresh ginger root
1/2 teaspoon minced garlic
2 tablespoons chopped green onion
1/4 teaspoon red pepper flakes (optional) I left it out
3 tablespoons cornstarch
2 tablespoons water


Chicken:

2 boneless, skinless chicken breasts, cut into 1/2 inch pieces
3 tablespoons olive oil
   If you want to bread the chicken you will also need
1 cup all-purpose flour
1/4 teaspoon salt
1/4 teaspoon pepper

Directions

  This is how I made it...
If you do not want to bread the chicken do it this way:

  1. Pour 1 1/2 cups water, orange juice, lemon juice, rice vinegar, and soy sauce into a saucepan and set over medium-high heat. Stir in the orange zest, brown sugar, ginger, garlic, chopped onion, and red pepper flakes. Bring to a boil until thickened, about 10 minutes. 
  2. While the sauce boils dice your chicken and heat oil in a pan, add chicken to the pan and cook until chicken is browned on all sides. 
  3. Add sauce to chicken
  4. Add corn starch to water to make a slurry, add cornstarch slurry to chicken and sauce. Cook until sauce thickens about, about 10 minutes
  5. Serve over fried or white rice.

If you want the chicken breaded do it this way...

  1. Pour 1 1/2 cups water, orange juice, lemon juice, rice vinegar, and soy sauce into a saucepan and set over medium-high heat. Stir in the orange zest, brown sugar, ginger, garlic, chopped onion, and red pepper flakes. Bring to a boil. Remove from heat, and cool 10 to 15 minutes.
  2. Place the chicken pieces into a resealable plastic bag. When contents of saucepan have cooled, pour 1 cup of sauce into bag. Reserve the remaining sauce. Seal the bag, and refrigerate at least 2 hours.
  3. In another resealable plastic bag, mix the flour, salt, and pepper. Add the marinated chicken pieces, seal the bag, and shake to coat.
  4. Heat the olive oil in a large skillet over medium heat. Place chicken into the skillet, and brown on both sides. Drain on a plate lined with paper towels, and cover with aluminum foil.
  5. Wipe out the skillet, and add the sauce. Bring to a boil over medium-high heat. Mix together the cornstarch and 2 tablespoons water; stir into the sauce. Reduce heat to medium low, add the chicken pieces, and simmer, about 5 minutes, stirring occasionally. 
This recipe is very adaptable to your personal preferences.
For the rice you can use any combination of whatever rice you like. Cooked cooled rice works best for fried rice. I either cook mine the night before or in the morning and let it cool in the fridge.  Our favorite is a blend of basmati and brown rice. You can add cooked diced chicken or beef as well as any other vegetables you like.
 Ingredients:
3 cups of cooked rice
3 slices of bacon (diced)
1 medium onion diced
1 Tablespoon sesame oil
2-3 Tablespoons soy sauce
1 Tbsp oyster sauce
1 carrot, finely diced or Julienned
1/2 cup peas
1 egg (optional)

Directions:
Cook Bacon in pan you will cook rice in.
When the bacon is just about done add diced onion and cook until it is translucent.
Add sesame oil, push onion and bacon to the side. Add egg and scramble.
When egg is cooked mix together with bacon and onion,
Add rice, oyster and soy sauce. Stir rice continually until all ingredients are mixed well.
Add Peas, stir to mix well. Add carrots, continue to stir/toss rice.


Helpful equipment: Wok, Stir Fry pan or Large Skillet

Sunday, April 22, 2012

Meal plan 4/22 - 4/28

Sunday - Glazed meatloaf
Monday - Orange chicken w/ fried rice NEW
Tuesday - Grilled Burgers w/grilled potatoes
Wednesday - Kielbasa w/ peppers & onions
Thursday - Tater tot hot dish
Friday - Chicken enchiladas (filling for this is leftover from last weeks grilled chicken tacos. I will just add some cooked rice to the filling)
Saturday - Grilled steak... I need something no fuss and easy since I will be busy hosting my Pampered Chef show :) I am sooo excited!

On my list to try this week... Home Made yogurt... I have been doing lots of reading so we will see what happens :)

Best Glazed Meatloaf I Have Ever Eaten

I love meatloaf, always have, but I struggle with making meatloaf with good full flavor. I never make it the same way twice so  I have been searching for recipes. While I love Ree the PW I do not like her meatloaf recipe. So sorry Ree! I have found a Crock pot recipe that is pretty good and have made multiple times Here is that recipe Mary's Meatloaf .  While watching my much loved PBS cooking shows last weekend Bridget made a glazed meatloaf that looked good and not to putzy. I normally do not like glazed meatloaf because in my experience the top it just slimy and mushy. I must say that this recipe is really good! It did take a bit of time to assemble but I made enough for 2 dinners :) The glaze tasted great and was caramelized beautifully! Here is the recipe Glazed Meatloaf from Cooks Country

*UPDATE *  I have changed the basic recipe just a bit to reflect how I make it.  here is my printable...


To make cleanup easier I lined a large sheet pan with foil and placed an oven safe cooling rack on top. I then put a smaller piece of foil on top of the rack and poked a bunch of holes in the foil so grease could run off. (I hate grease soaked meatloaf!) It worked well. They still needed to be washed but it was not too bad considering

If you do not like Thyme you may need to decrease the amount of that herb. It was a tiny bit too much for me. I did not use all the glaze on the loaf. Next time I will either use it all or cook what is left in a pot on the stove to serve with the meatloaf. We all really liked the taste of this.It is a keeper in my book and I will make it this way again.

I hope you like it too!

Monday, April 16, 2012

Guess what I made today?


I almost cannot believe I actually made it and guess what? It was not very hard!

I made…. Mozzarella cheese! Even better it was ready to eat in about 30 minutes! 

Best part… it only cost me about 3$ to make what would equal 3-4 balls of fresh mozzarella from the grocery store.


Here is what mine looked like just before I started to strain it


Here is the finished product :)


it is YUMMY too!

So I made myself a pizza for lunch :)


Is it OK if I admit I feel like a "Homemade superstar" today?  

What will you try next?

I am going to try to make Ricotta out of the leftover Whey (which there is a TON of!)

Sunday, April 15, 2012

What we ate last week and this weeks plan


Time got away from me last week so I never posted last week’s dinner plan. Here is what we ate last week.
Sunday …  Easter ham I saved .50 a LB and got the same cut as the Spiral Ham I normally get from Aldi and looked up a glaze recipe. Basic Ham glaze
Monday…  I was under the weather so I caved and we had frozen Pizza from Aldi
Tuesday…Scalloped Potatoes and Ham A-la The Pioneer Woman Ree Drummond
Wednesday… Rush hour Chicken Fajitas One of my favorite recipes from my time as a Pampered Chef consultant. Every Busy mom needs this recipe!
Thursday… Sloppy Joe’s
Friday… Pork Chops w/roasted sweet potato wedges
Saturday… Burgers on the grill w/ Loaded baked potato Salad

And here is the plan for this week…4/15/12 - 4/21/12
Sunday …  Whole Chicken roasted in the Crockpot
Monday…  Cheeseburger Macaroni
Tuesday… Shredded Chicken Hard Tacos courtesy of Nick at Macheesmo
Wednesday… Pulled Pork (not totally sure of how I will prepare this yet except it will be in the Crockpot
Thursday…  Tortellini bites (basically served with a Parmesan and butter sauce)
Friday… Pizza
Saturday… Meatloaf, I saw a great episode of Cooks country this weekend and I want to try out their recipe.

Enjoy!

So sorry I have not had a chance to type up my Easter bread recipe's I will get to it I promise!

Monday, April 9, 2012

Our Mostly Homemade Easter…

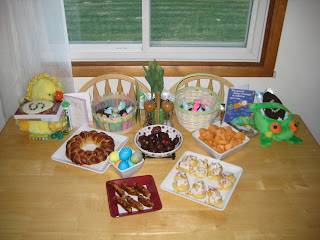
This was one of the most fun and rewarding Easter's I have prepared for my family! Yes it was some extra work but so worth it and well received. I can not tell you how empowering it was last week to walk out of Target only having purchased Starburst jellybeans (with a coupon of course!) and 1 small toy for each child. (the books were purchased from the school book fair) As I looked at the people around me with carts full of pre-packaged treats I just smiled to myself and had faith that my plans would workout.

** Disclaimer... I have nothing against prepackaged treats! I believe in choice. I wanted to try something new. My kids are already hoping the "Easter bunny" will make/bring these awesome treats for them again next year :) What can I say... I'm a lucky wife and mom!

I Love Easter!


Here is the list of things we made...
  Family traditions…
  Hopping Bunny rolls
  Easter Bread
  Colored eggs. I tried the bake in the oven method and was not super happy with it.

New to us…
  Homemade “Cadbury” Crème eggs
  Peeps
  Reese’s eggs with milk, semi sweet and white chocolate
  "Solid" milk and white chocolate eggs with the kids initials on them. I poured my leftover dipping chocolate onto Parchment paper and formed an egg shape. Then made their initials with leftover chips. The Kids LOVED them :)

Breakfast menu...
Easter eggs! I tried the bake in the oven method and was not super happy with it.
Easter Bread,
Hopping bunny rolls
Cantaloupe
Home made pork sausage

The Recipes…
Homemade Cadbury Crème eggs… These are seriously good!
·         1/2 cup light corn syrup
·         1/4 cup butter, room temperature
·         3 cups confectioner’s powdered sugar (I used ½ organic only because I had it)
·         1 teaspoon vanilla (I used a clear variety)
·         1/4 teaspoon salt
·         yellow food coloring (I made mine a bit more orange to look like farm fresh eggs)
·         1 (12 ounce) bag milk chocolate chips

I followed the instructions here. Homemade Cadbury Creme Eggs
These were pretty easy. Here are my tips and things I learned…
When rolling out centers of eggs it was very helpful to keep my hands dusted with powdered sugar. It was still sticky work but it helped. 
              *Side note I Love my Flour sugar shaker(s) yes plural, I have 4 of them and use them all! What do I have in them? Let me tell you…  cinnamon/sugar blend, flour, powdered sugar & one has baking soda (I use this for cleaning sticky pots/and and for stained counter tops).
Definitely use parchment paper.
I thinned my chocolate with a bit of coconut oil.
I had to do the dipping method since I do not have any molds. 
A small 2 Qt Crockpot works great as a double boiler to keep your chocolate warm.
Take your filling/insides out of the freezer in batches of 5-6.  They get soft quick and the harder they are when you dip them the better!
Let them sit on the counter to set up as long as you can. I rushed mine back into the freezer so the kids would not see them. When I took them out later they had a lot of condensation on them and remained a bit sticky.
Here are some of my production pictures...


Mmmmmmmmmmmmmmmmmmmmmmmm!


Peeps…
I followed these instructions here. homemade peeps how to tutorial and recipe
 Homemade Peeps Recipe:
  • 1 envelope unflavored gelatin
  • 1/3 cups cold water
  • 1 cup sugar
  • 1/4 cup water
MY Tips...
You definitely need a thermometer that goes to 238 degrees. Mine only went to 220 and I think I over cooked my sugar mixture a bit. I also slightly over whipped my sugar mixture. These set up quick and can be a bit tricky. Here is another good tutorial and I may do it this way next time. I also overfilled my small piping bag. Lesson  learned! Here is how mine looked… 
 I decided toward the end when the marshmallow was setting up fast to make "Peep Nuggets" 
As for taste I liked the blue peeps better because I covered these with sugar I dyed. It is much finer than the store bought Pink colored sugar.

side note... if you let these sit out they will dry out and get stale to the point where they taste a bit like "Circus Peanuts" Candy

 Breakfast Sausage , I’m still perfecting my blend of spices but this is a pretty good start… 
1 lb. ground pork
1 Tbs. fresh thyme, finely chopped
1 Tbs. fresh cilantro, finely chopped
1 Tbs. brown sugar *
1 Tbs. dijon mustard
1/2 Tbs. olive oil
1/2 Tbs. kosher salt
1 tsp. chili powder
1 tsp. ground black pepper
1/2 tsp. grated nutmeg

Combine all ingredients in a bowl and mix thoroughly. Form into eight 2" wide, 1/2" thick patties
*Leave out the brown sugar and it will taste a lot like Jimmy Dean Breakfast sausage 

the bread recipes will be posted in a bit... :)

How was your weekend? Did you do or make anything special or new?


Saturday, April 7, 2012

Best laid plans...

So just because you have a meal plan does not mean your week will go according to plan...
I had to change up my plan last week a bit bit you know what... It was totally fine. Life happens...
We did try the Diablo beef, I was not impressed so will not be posting the recipe. I ended up making pasta on Monday because I got busy and forgot to prep my chicken. We were supposed to have the sour cream chicken tonight but Oops, I forgot to get more sour cream so we are having the teriyaki chicken and rice tonight.

I got adventurous this week and decided that all the home made Easter treats I had been seeing on Pinterest looked really good so I have been making special home made versions of some family favorites that are normally store bought. I also made my traditional "bunny rolls: and Easter Bread. The Girl Helped a lot with the bread and I sure was grateful! I will be posting Pics soon along with recipes. in the mean time here is my Easter Bread from last year...


Sunday, April 1, 2012

Meal plan for week of 4/1 - 4/7

Sunday...  Chicken Enchiladas
Monday... Chicken teriyaki with fried rice
Tuesday... Diablo beef (arm roast in Crock pot) New
Wednesday...   Garlic Chicken
Thursday... Pizza (home made) We did not end up having this last week :)
Friday... not sure what is going on yet... I think we are going to a pot luck banquet so I need to figure this out.
Saturday... Sour Cream and Bacon Crockpot Chicken New

Saturday, March 31, 2012

Banana muffins and a tip for serving them to your family hot out of the oven first thing in the morning

My hubby had to be up and out early this Saturday morning to help with our district Pine wood derby so I wanted something hot for him and the kids. So I made Banana muffins.


Sorry the picture kinda stinks. It was early and my brain was not yet fully functional and I had not yet had coffee :)


Now I know what you are thinking... How did you whip those up at such an early hour? Well the trick is I had made the batter a few weeks ago and froze it in the muffin wrapper! Yes you can do that!

First here is the recipe I used... Banana muffins It is similar to the recipe I grew up with but it uses melted butter instead of shortening (Bonus if you ask me!) Line your muffin pan with liners (paper or silicone) Fill 1/2 to 2/3 full (I tend to under fill when I am going to freeze them. I feel they bake better). A metal scoop works great for this! and pop into your freezer. After they are frozen you can remove them from the pan and put into a zip top freezer bag.

When you are ready to bake put the # of muffins you want to  bake back into a muffin pan, put it into your oven  and turn it on to the desired temp. Bake for the normal time knowing you may need to bake them a few extra minutes but do the toothpick test to be sure (insert a tooth pick into the center of muffin and if it comes out clean it is done.)

Hubby really liked these. He said they were moist an yummy and the Girl liked the slight crispy-ness on the top.

Oh and I was extra nice and made hubby an egg sandwich while the muffins were cooking. So if you see him today and he is in an extra good mood... you are welcome... :)

Friday, March 30, 2012

Bottle Tote

I have had the idea for this for a while... My Girl Loved it!


I made it out of the leftovers of a pair of jeans that I had cut off the legs after the knee blew out. I made shorts out of the top of the jeans for my girl and could not bring myself to throw out this pretty embroidery. Blue also happens to be my girls favorite color :)  The strap is from an old pair of my jeans that had worn out beyond repair.

Are you a "Pinner"?

OK I admit I have a problem... I have become addicted to pinterest. Like I needed something else to take up my time. But here's the thing... I have actually been learning some cool things and it has helped my inspiration :)
I have seen some "pins" about awesome school lunches and had some of these cool ziploc containers which were not working for my hubby's lunch as I had hoped but they work great for the Boy. Here is what I sent with him today...

He was super excited! Never mind it is similar to the lunch he gets every day :)
PB with home made strawberry jam, raisins, pretzels & a Granola thin.

Meal plan 3/25 – 3/31 (First published 3/26/2012)

Back from another bit of a bloggin break... I'm working on getting back on track with my meal plans and letting you all know what we have been up to. Please try some of these recipes they are seriously good :)


Sunday, Grilled Marinated Turkey breast ... This was new for us and oh so good!
MondaySteak Fajitas in the Crock Pot with Mango Salsa ... This has become a favorite
Tuesday, Herb Crusted Pork Chops ... New
Wednesday, Tasty and Tender round steak W/ scalloped potatoes ... New
ThursdayCrock Pot Cream Chese Chicken
Friday, Home made Pizza See my pizza post here...
Saturday, Chili because I can start it in the morning and just leave it. The Hubby and I have a busy day with the kids so I need something that will be ready when we get home. I have leftover cornbread in the freezer I will serve with it.

Valentines day... (First published 2/15/2012)

I am in the minority that I am not a big fan of valentines day. I do still want to do something nice for my kids though so here is what I made them for dinner...

They Loved it and thought it was pretty cool.
Here is my "go to"  pizza dough recipe. It will yield 1 Large pizza or 2 medium thin crust pizzas.
I double it most of the time.
Pizza Dough
Printable recipe for Pizza Dough
Ingredients:
2 1/4 cups all-purpose flour
Extra flour may be needed if your dough is super sticky
1 (.25 ounce) package active dry yeast (or 2 1/4 Teaspoons)
1 teaspoon salt
1 tablespoon white sugar (or granulated sugar substitute)
2 tablespoons vegetable oil
1 cup warm water (110 degrees F/45 degrees C)
Heat oven to 400 degrees

Mix flour, yeast, salt & sugar in a large bowl (I use my Kitchen Aid mixer with the dough hook attachment).
Add in water and oil. Stir until mixed thouroughly (dough pulls away from the sides of the bowl).
Cover and let dough set for 15 minutes at least, an hour is better.
Sprinkle a bit of flour or cornmeal or flour onto a baking stone or lightly oil an aluminum pan.

With wet or floured fingers press dough out to desired size. Top with sauce and your favorite toppings and bake at 400 for 15-20 minutes
           
See those happy faces... OK maybee valentines day isn't so bad :)
Helpfull equipment:
Pizza Stone
Mixer with dough hook