I am on a mission... to create, to inspire, to learn, to educate, to save, to grow, to be better... Join me :)
Showing posts with label family favorite. Show all posts

Saturday, August 8, 2015

Chili!

Written Monday August 3rd.  

Today has been a gorgeous day in central MN! The temperature and humidity has dropped, my hubby is home for the week and the kids have NO activities! Yes Triple bonus! With that being said I have been wanting to make Chili for a few weeks but it has been so darn hot that I just could not deal with cooking something low and slow all day (my preferred method for chili). Also my garden had this to offer today...


  Chili is one of those recipes I never make the same way twice. It is a very forgiving dish so feel free to experiment a bit. The hardest part of this recipe is cooking the ground beef. After that you add it all to your Crockpot and let it simmer for 4-6 hours on low.

get the printable version here... chili


Ingredients:
3 pounds ground beef browned and crumbled
2 small onions diced
1 can chili beans (I used mild)
1 can black beans
3 garlic cloves (run thru a press is best)
1 can diced tomatoes or 2 cups fresh diced. (feel free to add more or less to taste)
1 Tablespoon of chili powder (more if you like it spicy)
1 1/2 Teaspoons of paprika
1 teaspoon oregano
1/2 teaspoon garlic powder
1 Tablespoon cumin
salt and pepper to taste (I used about 1/2 teaspoon of each)

Instructions:
 Brown the ground beef in a large skillet and chop into fine crumbles as it cooks. Add Ground beef to a large Crockpot (5 quart MINIMUM!). Add the rest of the ingredients and let simmer on low for 6-8 hours.

Please taste at least 1/2 hour before serving. You can adjust any of the seasonings to suit your own tastes.

Also here are some things you could add to make it your own...
Diced Jalapenos
Diced bell peppers or any kind of pepper
Corn (I recommend frozen)
Diced zucchini
Diced summer squash

 Optional toppings:
Shredded cheddar
Sour cream
 
I served this with cornbread. You can find my favorite recipe here... golden sweet cornbread


   I have to say this was one of the best batches I have made in a long time and everyone agreed!

* Disclaimer!!! Every Crockpot is different! I used my large 8 quart Crockpot and it cooks super hot. I put it on high for an hour them backed it down to low for a few them left it on keep warm. If I was going to be gone for 6-8 hours I definitely would put it on low and maybe add a bit of water.

The best part about this dinner is we only ate half of it and even had half the cornbread left so I packaged it up and put it in the freezer for dinner another night when I don't feel like cooking! Yes, woohoo!

Putz factor... 3... yes there are a lot of ingredients but it does not take long to get them all put together. After it was all in the pot I really did not think much about it the rest of the day :)

Sunday, August 2, 2015

Chicken, Bacon, Onion & Cheddar Wrap

   I reluctantly threw dinner together tonight. I have been so busy running the kids around all summer that cooking has just not been a priority for me. Also it's been pretty warm here in MN so most of my cooking has been on the grill. Tonight's dinner was cooked on the stove top.

 I don't have a picture but here is what I came up with... Edit... I now have pictures but they are not pretty. Luckily It tastes amazing!!!


Chicken, Bacon, Onion and Cheddar Wrap

click to print here ... chicken, bacon, onion &cheddar wraps

Ingredients:
2-3 boneless chicken breasts
1 medium onion sliced
5-6 slices of bacon
Garlic and herb seasoning (or pepper to taste)
cheddar cheese (I used some shredded I had on hand) 
10 inch flour tortillas

Cut your bacon into 2-3 inch slices (I just cut 3 inches off the end of a new package).
Lay the bacon in your pan and start cooking. I used my cast iron skillet, a stainless pan would work well too. If all you have is nonstick that's fine just go with it. While your bacon is warming up fillet your chicken (cut each breast into 2 thinner strips) and place on top of the bacon. Add your favorite herb seasoning.  I used a garlic and herb mix I got at Aldi earlier in the summer. Slice your onion and add to the pan. It was a bit awkward to move the chicken around to keep the bacon on the bottom but it paid off in flavor. When everything is cooked remove the chicken one fillet at a time and cut into strips and return to the pan. Mix everything up. Warm your tortillas. I added the cheddar then piled up the chicken mixture and wrapped it all up burrito style.  

YUM! Everyone LOVED this. My hubby did request a chipolte (Sp?) sauce next time but even he liked it as is.

Obviously you could add any other veggies you like to this. I'm sure bell peppers would be awesome as well as jalapenos or any hot pepper you like.

Helpful tools:
Cast Iron Pan
Tongs

   To be honest cooking has just not been something I have been enjoying lately. I doubled my work hours last fall and my kids have had more activities. I know I have preached about meal planning in the past to help get meal times under control but admittedly I have not taken my own advice. I'm not totally sure why it has been such a struggle for me. I think it's partly because I have been fighting a lot of depression. I have not written publicly about my loss in May of 2014 but here goes... My youngest brother lost a battle with Lung Cancer at the age of 28. There it is... I said it.  
   Nothing can prepare you for a big loss. You just get through one day at a time and hope for more good days than bad days. I am thankful that I have amazing friends, a wonderful husband and great kids. I cherish them every day and try not to take any day for granted. :)

  I hope you all are having an amazing summer and please give this a try. It was pretty easy, fairly quick and not too putzy.  I give it a 2 1/2 on my Putz factor scale.

Monday, April 28, 2014

Meal plan 4/27 -5/2 and catching up...

I was worn out after Easter and last week was crazy busy. So sorry I did not get around to posting my plan for last week so here it is...

Meal plan 4/20 - 4/26
Sunday - Easter - Spiral ham in the Crockpot
Monday - Quesadillas
Tuesday - crockpot bacon & cheese chicken
Wednesday - Grilled hot dogs and sweet potatoes
Thursday - Teriyaki chicken and fried rice (from the freezer!)
Friday - Pizza
Saturday - Dinner out :)

And here is this weeks plan...
Meal Plan 4/37 - 5/3
Sunday - Grilled chicken
Monday - Chicken Cordon Bleu casserole (from the freezer)
Tuesday - Grilled Rib-eye steaks
Wednesday - New   minestrone soup
Thursday -  New    Tex mex chicken salad
Friday - Pizza
Saturday - New  crock pot Mongolian beef  

Friday and Saturday may have some changes due to it being my Birthday and my family may have something planned or I may get really lazy :)

Here are some photos of our happy Easter!


Monday, April 14, 2014

Meal plan 4/13 - 4/19/2014

    Often when I talk with people about meal planning their first reaction is "oh I could never do that!" Or "What if something comes up?" I say Sure you can and if something comes up roll with it. Last week was a perfect example for me. Sunday I was just plain wiped out so we ordered pizza and another night I had run out of an ingredient I needed so I swapped a recipe from another night. If I remember right I swapped dinner on Tuesday and Thursday. It was an easy fix and no stress. Meal planning does take a bit of forethought but in the end it has reduced my daily stress level. I started by planning out a few weeks at a time and now I try to sit down at least once a week and plan for about 2 weeks out. As we come into warmer weather I try to always have burgers, hot dogs or brats (paired with a nice salad of course) on hand for a quick grill option if we feel like being outside or I just want a quick easy dinner.

Here is my list for this week...
Sunday - Cheesy Potato soup W / ham
Monday - Kielbasa W / onions and bell peppers
Tuesday - Chili W/ Cornbread (Chili is from the Freezer)

Wednesday -  Roasted Chicken (in the Crockpot)
Thursday -  Mexican Chicken Salad Inspired buy this recipe
Friday - Crockpot steak fajitas
Saturday -  Pizza, We will be eating out since we will be at a family outing.

Monday, April 7, 2014

Quesadillas

One night 2 weeks ago Quesadillas were on our meal plan. I had not made them in a while so I was really happy to run across this recipe hearty black bean quesadillas

Many thanks to Beth over at budget bytes for the inspiration!

I changed it up just a bit but my version was definitely inspired by this recipe. My changes are in Bold Italics


This was before I added the cheese and cilantro. I was lucky to remember to take a photo at all :)


Ingredients
  •  1/2 pound of cooked ground beef (crumbled) Because if I do not add a bit of meat my hubby will give me a funny look :)
  • 1 (15 oz.) can black beans
  • 1 cup frozen corn kernels (1 can of Corn Kernels. I use the Aldi Brand)
  • ½ small red onion
  • 1 clove garlic
  • ¼ bunch fresh cilantro (I only had dried)
  • 2 cups shredded cheese
  • 1 batch taco seasoning
  • 10 taco sized tortilla  (I used yellow corn tortillas)
  • Optional toppings... Jalapeños, sour cream, tomatoes, lettuce, guacamole, avocado
The original authors Instructions:
  1. Drain the can of beans and rinse lightly. Place the beans in a large bowl along with the corn (no need to thaw).
  2. Rinse the cilantro, remove the leaves, and chop roughly. Dice the onion and mince the garlic. Add the cilantro, onion, garlic, and shredded cheese to the bowl with the beans and corn. Lastly, mix up a batch of taco seasoning and add to the bowl. Stir everything until evenly mixed.
  3. Place a half cup of the filling on one side of each tortilla and fold over. Cook in a skillet on both sides over medium heat until brown and crispy and the cheesy filling has melted.
  4. To freeze the quesadillas, simply fill each one and place on a baking sheet lined with parchment paper. Place in the freezer for one hour to solidify the quesadillas and then transfer to a freezer bag. To reheat either microwave (for a soft quesadilla) or cook in a skillet on low heat (make sure to use low heat so that the filling has time to thaw and melt before the outside burns).
What I did:
    I cooked the ground beef in a medium fry pan. Turned off the heat then added the rest of the ingredients (except the tortillas and toppings).
    Heat a large skillet (I used my double burner griddle) lightly coat the pan with oil (I used my sprayer but a pastry brush would also work to get a light coating). Place tortilla on pan place 1/3 cup of filling off to one side of the tortilla. Add a bit of extra cheese if you like. Fold over tortilla. Hold in place for a minute until tortilla has set. Cook until crisp on each side and filling is warmed through.
 
This fed all 4 of us VERY well!  I had a good amount of filling leftover so I made up burritos for my hubby for work lunches.

My whole family Loved these and were happy campers!

Saturday, April 5, 2014

Meal Plan 4/6 - 4/12 2014

Generally I only post dinners but I am making breakfast on Sunday as well.
We are having cinnamon rolls sausage and fresh fruit.  More on this Cinnamon roll recipe another day but know that it is FANTASTIC!


For general breakfasts this week I made 2 loaves of cinnamon raisin oatmeal bread

Sunday -    taco pasta bake
Monday - Chicken cordon-bleu casserole see my post Here   
Tuesday -  barbecue beef and cheesy potato casserole   New!
Wednesday -  Oven Fried Chicken   (family favorite)
Thursday - Tortellini Bites
Friday - Grilled Steak
Saturday - Frozen Pizza  (hubby is in charge as I will be gone scrapbooking)

Sunday, March 23, 2014

Meal plan March 23rd - March 29th 2014

We will be trying a bunch of "new to us" recipes over the next few weeks. I have added links to the original sources so those awesome bloggers can  get the credit!I probably will alter many of the recipes a bit to suit my family's taste

The end of the week will be busy with a band concert for the girl and I am out of town Friday evening - late Saturday afternoon so the family will be eating Freezer meals, Yay for them and no worries for me! :)    Side note, I'm so happy to be spending some relax / scrapping time with 2 of my favorite gal pals! ;) Wahoo!
 
Sunday - Meatloaf  See my post here for details 
Monday - Cheesy Chicken and Rice casserole NEWSee recipe here

Tuesday - Baked Pork Chops NEW!   see recipe here
Wednesday - Teriyaki Chicken (in the Crock Pot) NEW!  See recipe here
Thursday - Quesadillas  NEW! See recipe here

Friday - Ravioli & Garlic bread (leftover from the freezer) See recipe here
Saturday - Sheppard's pie (Made ahead from the freezer) See my recipe here  and See my original post here  :)

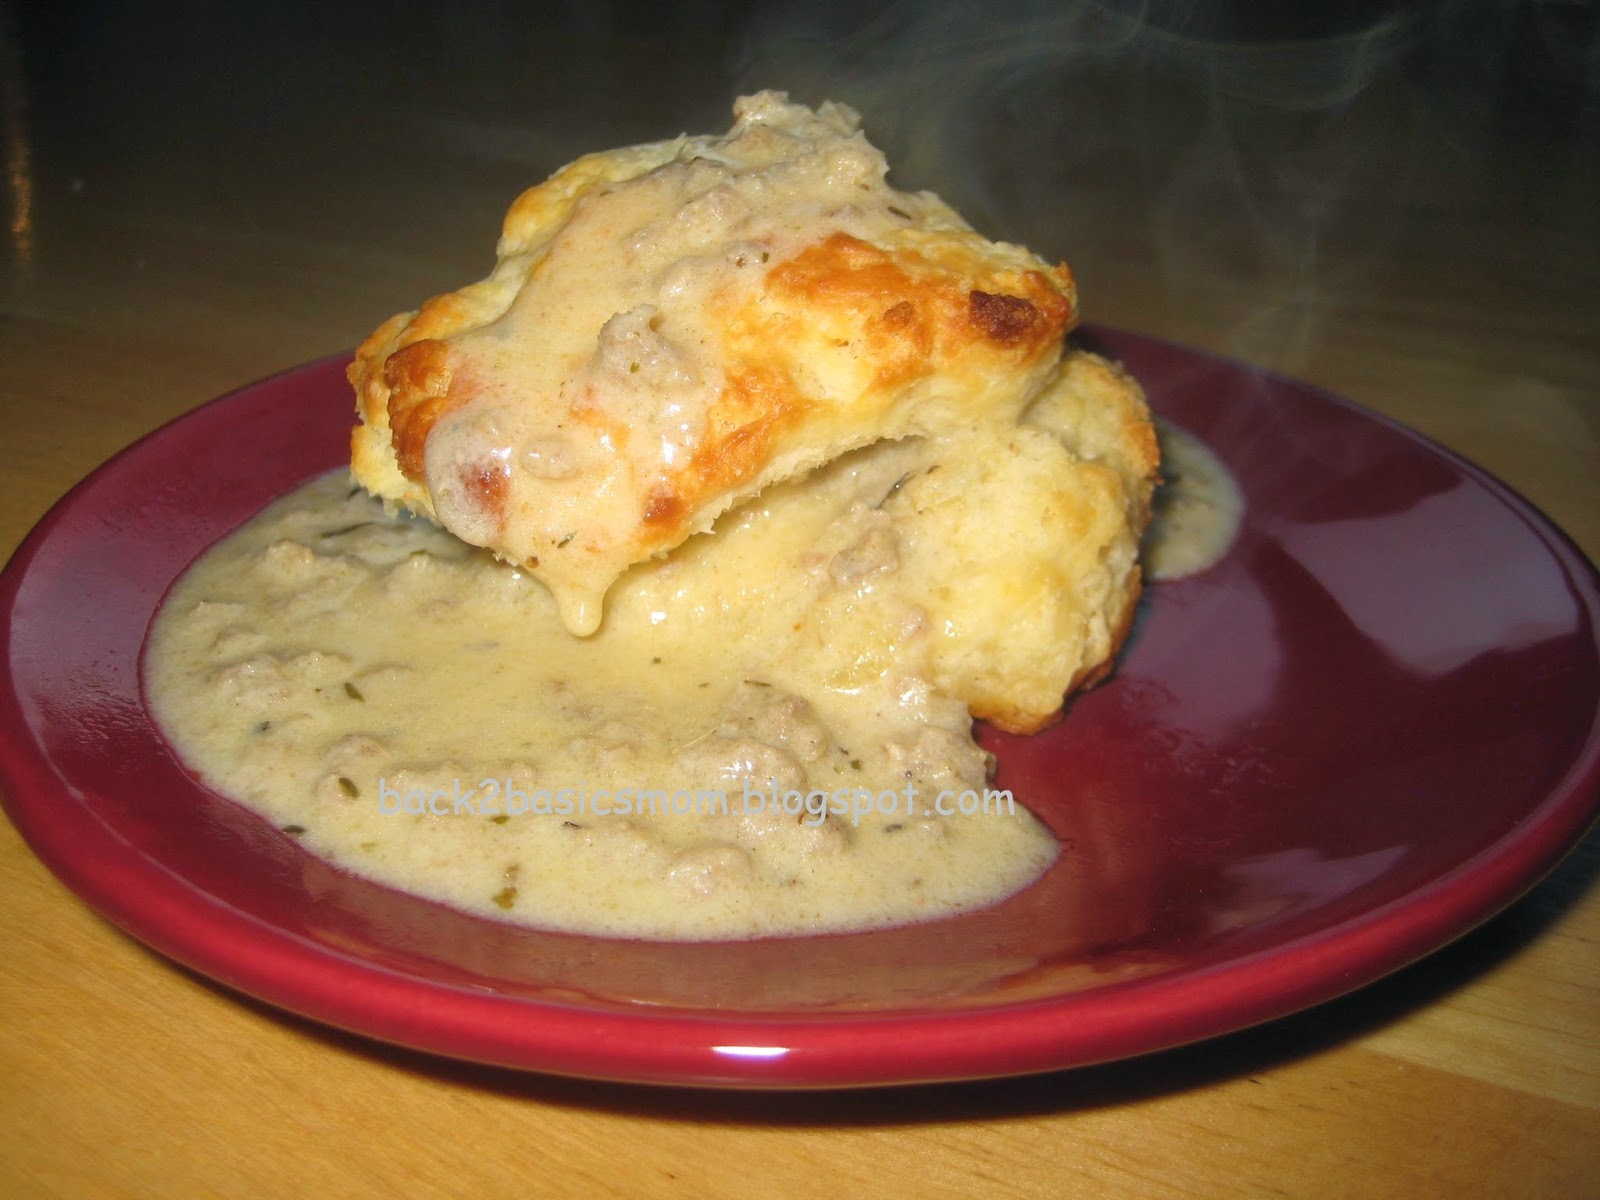
Breakfast this morning was a family favorite... Biscuits and gravy... (recipes coming soon)

Sunday, January 26, 2014

Meal plan Jan 26th - Feb1st 2014

I'm working on meal planning again for many reasons...
1. My kids have after school activities 4 days a week
2. I'm working part time (which I love and am grateful for!)
3. I want to use my crock pot more due to the fact that my oven and stove are propane and the price of propane has skyrocketed here in the Midwest.

Sunday: Hungarian Goulash
Monday: Bacon and Cheese Chicken
Tuesday: Steak fajitas
Wednesday: Potato soup
Thursday: Tater tot hot dish (it's a MN thing!)
Friday: Sweet Garlic Chicken ( NEW! I saw this allover FB and want to try it!)
Saturday: Ravioli with Italian beef

All these recipes will be made in the Crockpot!

Here is the Steak Fajita recipe :)  Print

Ingredients:
1/2 cup salsa
1 clove garlic, minced
1 tablespoon fresh lime juice
1 teaspoon freshly ground black pepper
1/2 teaspoon salt
1 1/2 pound of steak, trimmed of excess fat. Flank is good I generally use tenderized round (AKA cubbed steak)
1 red bell pepper, cut into 1/4-inch strips   (you can use all green peppers to save $!)
1 yellow bell pepper, cut into 1/4-inch strips
1 green bell pepper, cut into 1/4-inch strips
1 large onion, thinly sliced
2 teaspoons minced fresh cilantro for garnish (dried is OK too)

Directions:
In a small mixing bowl, combine salsa, garlic, lime juice, salt and pepper. Place flank steak in a 4-5 quart slow cooker and pour sauce over steak, making sure to coat steak well. Add bell peppers and onion. Cover and cook on low heat setting 6 to 8 hours (OR on high heat setting 3 to 4 hours).

Remove steak and vegetables from juice and let steak stand 10 minutes before slicing. Slice steak thinly across grain of meat. Serve with peppers and onion. Garnish with fresh cilantro and your favorite toppings.
*TIPS*
If you want more heat use a spicier salsa or add diced Jalapeños.

This is great with guacamole or a Mango Salsa!
For more tender meat place your beef on the counter for about an hour before adding to crock pot. I'm not sure why this works but it does for me.

I highly recommend cooking this on Low Vs. High!


My favorite Guacamole (that my husband will eat!)

1 ripe avocado mashed
1-2 Tablespoons finely diced red onion
1 Teaspoon lime juice or to taste
salt to taste
cilantro to taste 1/2 Teaspoon dried or 1 teaspoon diced fresh
1 roma tomato diced (optional)  I do not add this when the Hubby is sharing :)
1 diced Jalapeño (optional) I do not normally add this for myself.

If a recipe does not have a link either it is new, I do not have it typed up yet or its a recipe i never do the same way twice :) It's just how I roll...

Saturday, January 11, 2014

Cinnamon Raisin Oatmeal Bread

* UPDATE *  I have made this 4-5 times now and you really do need to weigh the ingredients! The results are MUCH better!


Isn't it funny what can result from looking up info online? I was looking for tips on freezing bread dough and I ran across this awesome bread cooking forum called The fresh loaf. There I found wonderful advice, tips and yup recipes!

I have also been thinking it would be nice to have something easy and warm for breakfasts and something I could take to work that was also a bit healthier than a bagel. This bread looked like it would fit the bill by still being a bit indulgent but also being an OK food choice.

Looking at the recipe the first time I admit I was a bit apprehensive. It looked complicated. I was pleasantly surprised that while it took a bit more time than my favorite sandwich bread it was not too bad at all (at least as far as bread is concerned)

Here is a link directly to the recipe cinnamon raisin oatmeal bread

It is helpful to have a kitchen scale. Any serious baker will tell you it is better to weigh ingredients for baking. (I invested in a scale over the holidays when Aldi had them for $9.99).

Do not be like me... I did not read the directions fully and did not measure the water I soaked my oats in OOPS!!! Luckily it worked out OK... Phew...

Also after reading other peoples experience I only did 2 rise cycles. My first rise took some time. A few hours. Then I kneaded the dough and made it into 2 loaves. Yes the recipe calls for making 3 but I have larger stoneware loaf pans so I was pretty sure it would be fine. If you are using Pyrex bread pans definitely do 3! Or make rolls as another poster on the forum did. I will do that next time to try it out!

Next time I make this I will also slightly warm the water I use to soak my Oats. I think this may have hindered my rise a bit. Although a slower rise can create more flavor.  I was also a bit short on raisins but It was still fine.More would definitely be better though!

If you have NO experience with dough this would probably not be my choice for your first bread endeavor. It does take a bit of knowledge and experience to get a "feel" for if a dough is going to work out. If you have mixed and kneaded at least a few loaves successfully you should be fine :)

If you decide to give this a try hopefully this is what you will end up with... Enjoy!

Mmmmmm... Lots of melty butter to make it extra yummy!


Friday, July 26, 2013

OMG Bacon cheese burgers!


Most years my little family stays home on July 4th. We like to have a nice family day that includes some fireworks, fun and (hopefully Great) food. I try my best to cook our main meal over our fire pit especially since we built what I affectionately call my “redneck” grill.

Our menu looked like this:
Loaded baked potato salad
Green salad

Simple I know that’s why I try to bring something special to the table and this year I tried something new with our Burgers.

To start I diced about  1/3 of a red onion to yield about ¼ cup


Add salt and pepper about ½ teaspoon of each
Then I added some shredded cheddar I had in the freezer.
      (Note: in some of the pictures it shows a white cheese. That is because I forgot to take pictures of all the steps when I made them with Cheddar and When I made them the other day to freeze ahead all I had was mozzarella so I said what the heck, let’s give it a go!)

When you have all this mixed up  add  1.5 pounds of ground beef
         (Approximately an 80/20 blend. (I cannot tell you a specific fat content because we now get our beef from a local farmer and I do not know for sure the ratio at which the butcher grinds the meat/fat)

To make the patties more uniform I enlisted the help of my large stainless scoop. 

I scooped 1 portion, made a small patty then added a thin slice of butter, yes butter. 

This was a new one for me but I had heard the tip from a friend so I said “OK, why not” I mean its butter how could it be bad? The slice was about a teaspoon worth, or as thin as you can get from a cold stick of butter. Then add another scoop and continue to form your patty. 

Now the best part… wrap your patties with 2 slices of bacon. Mine is thicker and super smoky because along with the beef we just got our first whole pig so my bacon does look a bit more “rustic”


Now throw them on the grill!


When they are just about done top your burgers with your favorite cheese.
Don’t forget the buns! I splurged and got really nice buns and buttered them up and grilled them slightly before building our burgers. 


Top however you like!

We were very hungry by the time they were done so I do not have a good picture of the finished product :)
Ingredients:
 Red Onion
salt
 pepper
shredded cheddar cheese
1.5 pounds of ground beef
1 stick of Butter (not Margarine!)
Burger buns
Instructions:
Dice approximately 1/3 of the onion to yield approximately ¼ of a cup and add it to a medium mixing bowl. Add ½ a teaspoon of salt and black pepper. Add ½ a cup of shredded cheese. Mix these all up well then add your ground beef. Mix well to distribute flavors but try not to over work the meat as it can make the burgers more tough. I find using my hands is the best way to mix them well.
Scoop approximately 1/4th of a cup of meat mixture and make  a small patty then added a thin slice of butter. Then add another 1/4th of a cup of meat mixture to form your patty.

Wrap your patties with 2 slices of bacon.

For best results grill burgers outdoors.

When the burgers are just about done top your burgers with your favorite cheese.

Butter both sides of the burger buns and grill them till they are golden.

Top with whatever other toppings you like!

This is a very basic burger recipe that you can easily tweak to your own tastes.
You could add some Worcestershire, hot sauce, diced Jalapeños just about anything.
My family loved them and I am making them for my daughter (at her request) and her friends when we celebrate her birthday tomorrow.

Wait till I tell you about our Desert!

Wednesday, March 27, 2013

Chicken Cordon Bleu casserole

Some meals are just a pain! There I said it! For me Chicken Cordon Bleu is one of those meals. We love it but I hate preparing it! It is just soooo putzy! We are talking like a 10 here folks.

About a year ago I ran across this recipe on Pinterest for Chicken Cordon Bleu casserole It is soooo good! Yes it is still a little bit putzy but it makes a lot! Today I actually split it into 2 8x8 casserole dishes and freeze one (I will let you know how that turns out later).

A few changes I make are that I personally hate swiss cheese. I know I'm missing out but I just can't get around it. I usually use a mix of whatever I have on hand. I have used Mozarella, Colby jack, Monterey jack, you name it. All have turned out fine. I do always use the Parmesan called for. I also usually make my own breadcrumbs. I actually haven't purchased bread crumbs in years!

Also I am thinking of using this sauce mixture as my "go to" Cream soup.It is that good and so versatile!

So head on over to Cooking Classy And drop Jaclyn a note to say thanks for this delicious recipe.

My Putz Factor... 3.5 but soooo worth it!

Edit 7.21.13   I have frozen this multiple times and it turns out awesome! I put it in an aluminum disposable pan (usually the smaller square) and freeze it (uncooked) after its frozen I can fit this size pan in a large zip top bag of in my large foodsaver bags. I try to take it out of the freezer the morning I want to bake it or at lease a few hours before. It takes 45 minutes to an hour depending on how frozen it is. Since it has raw chicken in it I err on the side of cooking a little longer.

Wednesday, July 11, 2012

Mini Chicken Pot Pies...

A while ago I made a ton of pot pie filling and after making 2 large pies still had dough and filling left so I decided to try making Mini's and freeze them to cooking later.

Please disregard my awful looking muffin tin, yes it has seen better days but I think it's at least 15 years old and has seen a lot of use :)


I lined my muffin tin with my silicone baking cups just to make my life easier later. Froze them solid then placed the frozen mini pies into a zip-lock bag. 

Yesterday I decided I wanted the kids to have something other than PB&J for lunch so I baked these up. 

The verdict... Awesome! The kids really liked them and if you let them cool a bit you can eat them with your fingers. I baked them at 350 for about 25 minutes.

No I know you are probably looking for a recipe after me posting all this but I have a confession... I never make my pot pie the same way twice. I can give you an idea of what I put in it but thats the best I have for now :)

Chicken Pot Pie filling
Pie crust for a 8-9 inch 2 crust pie Here are links to some I have used and liked or you can use store bought. buttermilk pie crust   Perfect Pie Crust courtesy of PW
Diced Cooked chicken, 2-3 breasts worth
Assorted vegetables (whatever you like)
     Corn, onion, peas, potatoes cubed or diced fine.
1 can / serving of cream of something soup (chicken, garlic or onion are great) Store bought is fine or home made if you have it. Here is a basic recipe.
Salt 
Pepper
assorted dried herbs up to a teaspoon or 2, I have a rosemary blend I like.
milk or cream to thin out the mixture about 3/4 cup

Mix everything together in a bowl

For large pie ...Line your pie dish with bottom crust, add filling, add a bit of water with fingertips to rim of crust add top crust. finish edge of crust with your preferred method. I like to flute the edge with mu fingers. Bake at 350 for 45-60 minutes.

For mini pies use a large biscuit cutter (about 3") and put dough circle into muffin tin. Fill tin 3/4 of the way with chicken mixture. cover with a smaller disk of dough. (A set of cutters like these come in handy I have This exact set )

I totally winged these directions, like I said I never do it the same way twice. Luckily pot pies are pretty forgiving and if you do not add enough seasoning a bit of salt works great at perking it up.

Have fun!

Friday, July 6, 2012

10 minute home made strawberry ice cream without an icream maker!

So I was reading one of my Favorite Blogs the other day and she had posted about this "5 minute berry ice cream without an ice cream maker". I thought "hmmm I'm going to have to try that one day." One of the ingredients was heavy cream which I almost never purchase so I just added it to my "to try someday" file and forgot about it.

 A few days later I went to a local food distribution program and got all this heavy cream as part of a package deal.


So I decided to give the ice cream recipe a whirl!

I hauled out my trusty food processor (thank you swagbucks for helping me purchase this awesome kitchen tool!) 
I adapted This recipe a bit to make it easier for me and accommodate what I had available.

10 minute Strawberry Ice cream
Here is the Printable recipe

Ingredients:
4 cups frozen Strawberries, sliced, halved or quartered
1/2 - 3/4 cup of white sugar (adjust to your personal taste)
1/2 pint heavy cream (the cute tiny container)

Directions:
Add strawberries to your food processor.
Pour sugar over the berries.
Disclaimer: My pictures are not great for this post as I was impatient and it was super hot outside and I wanted to get this done and in the freezer ASAP! Also please ignore the weird stains on my very old counter tops. I have tried everything to remove them and they will not come off.

Pulse until the sugar and berries are mixed well and crushed pretty fine.

Slowly add in cream through the opening in the food processor. 
This part can get a bit frustrating if your processor is a smaller model like mine (it's and 8 cup vs. 12)  but if you take off the top and carefully move things around a bit with a wooden spoon (if you use a spatula you may cut it on the blade and if you use a spoon you could damage your blade) you will be all set. Turn on again and let it run until everything comes together. It will look all nice and slushy.
At this point you can put it in a container and freeze it so it gets nice and hard or you can serve it right away to you salivating children. I did both :)
This is what it looked like served right away
This stuff is AMAZING! I will say that I much preferred it after it had frozen solid. It scoops just like ice cream should and had a much nicer flavor I think after it had been in the freezer for 24 hours.

After serving this your family will definitely think you are the awesomest (yes it's a word, well today it is anyway) person in the whole universe!

If you find that you are getting lots of ice crystals next time stir your freezer mixture every 1/2 hour for a couple hours. It will help break them up.

Thursday, July 5, 2012

Fresh Picked Strawberries!

So last week the kids and I went out to a local farm to pick strawberries. I was super happy find a place that still had berries available because most of the local farms were already picked out. I had meant to go the week before but I was knocked out by one of the nastiest bugs I have ever had.

It  took us about an hour to pick all this...

I think the boy ate at least a pint and he definitely ate more than he picked. The girl did well picking, a bonus of her growing up a bit but she ate quite a few in the field too :) It was a gorgeous day and we had a blast.

The best part to me about this whole venture was that the kids did all the hulling!


Wahoo!

Yay me!

Thanks kids!


I then made approximately 20 pints of freezer jam... Phew what a day! Last year I managed to stretch the jam out all the way to the end of the school year. Hopefully I can do that again because the kids really love it. Last year I tried 3 different recipes and below is our favorite.

My Freezer Jam recipe. Here is the printable Strawberry Freezer Jam

4 cups of crushed strawberries
1 package of no/low sugar pectin
1/2 cup of honey (local is best)
1 1/2 cups sugar (next time I will try even less sugar)
1/4 cup water

Whir up your berries in a food processor or blender, then put into a heat safe bowl.
Add 2 Tablespoons of Pectin to the berry mixture.
Add rest of pectin to a medium saucepan with the sugar, honey and water. Bring to a boil for 1 minute. You just want to heat it up and get everything blended. Turn off heat and add sugar mixture to berries. Mix well to blend ingredients.
Pour into prepared containers. Let cool for a few minutes before adding lids. I let mine cool completely before I put them into the freezer.


I forgot to take a picture of my pile of finished jam but the bottom of my 10CU ft freezer is FULL!

The jam did not use up all our berries. I filled 2 trays of sliced berries to freeze (what I used for ice cream (recipe to come). We also ate lots with vanilla yogurt or put them on top of vanilla  ice cream. They were so huge and delicious it was well worth the work and effort!

Wednesday, July 4, 2012

Home made butter... mmmm

So I got a ton of Heavy cream as part of a food distribution program I went to... Hmmm now what?
Then I remembered a friend telling me she made butter last time she got a bunch of cream so I said to myself OK, I can do this!

There are lots of instructions online and luckily I have my trusty KitchenAid so I knew I could handle it. Still it's a bit daunting... I mean we don't make butter we buy it right? OK I'm over it lets give it a go :)

This was my favorite tutorial that I found homemade butter from The Hungry Mouse

Here are some pictures from my adventure...
 This is what it looks like after about 10 minutes and the nice fluffy whip cream is starting to break down.


Things go pretty quickly now and it gets clumpy looking.

 Now its ready for straining...


 This is after I have strained, kneaded, and rinsed out all the buttermilk. Sorry there are no in between pictures because my hands were covered in butter :) As an extra step I put the disc of butter into some sack cloth (you could probably use cheese cloth too) and folded it over and pressed to expel any remaining buttermilk. I also did mix in a bit of salt. Probably about 1/4 of a teaspoon.


 Mmmmm...


From 1 quart of cream I got 1 3/4 cup butter and over a cup of buttermilk we will use for pancakes or baking. I measured 1 cup into my handy dandy measure all cup and have a nicely measures cylinder to go into the freezer and wait until I need some butter for baking. If the heat ever breaks I will make some muffins and cookies .

So the ingredients I used were...
1 quart of heavy cream
1/4 teaspoon salt

handy tools:
A good stand mixer
a fine mesh strainer
flour sack cloth ( cheese cloth would probably work too)