I am on a mission... to create, to inspire, to learn, to educate, to save, to grow, to be better... Join me :)

Monday, April 28, 2014

Meal plan 4/27 -5/2 and catching up...

I was worn out after Easter and last week was crazy busy. So sorry I did not get around to posting my plan for last week so here it is...

Meal plan 4/20 - 4/26
Sunday - Easter - Spiral ham in the Crockpot
Monday - Quesadillas
Tuesday - crockpot bacon & cheese chicken
Wednesday - Grilled hot dogs and sweet potatoes
Thursday - Teriyaki chicken and fried rice (from the freezer!)
Friday - Pizza
Saturday - Dinner out :)

And here is this weeks plan...
Meal Plan 4/37 - 5/3
Sunday - Grilled chicken
Monday - Chicken Cordon Bleu casserole (from the freezer)
Tuesday - Grilled Rib-eye steaks
Wednesday - New   minestrone soup
Thursday -  New    Tex mex chicken salad
Friday - Pizza
Saturday - New  crock pot Mongolian beef  

Friday and Saturday may have some changes due to it being my Birthday and my family may have something planned or I may get really lazy :)

Here are some photos of our happy Easter!


Wednesday, April 16, 2014

Hi tech... Maybe not...

It's that time of year.... I'm making my annual foray into my families tradition of making easter bread. I'm not a novice at bread making but during cooler weather it can be a challenge in my house. We keep things on the cooler side which is not conducive to bread dough rising, especially this easter bread which has a relatively low amount of yeast relative to flour. Over the course of this VERY cold winter I have discovered a very hi tech way to help my  dough rise...


Here I have 8 loaves all rising at once :)    Stackable cooling racks are the BEST!


I have my Crockpot on the lowest setting and I moved the racks around every 15 minutes or so. You need to be careful as if it gets too hot your dough can actually cook and that is not the result we are looking for...

I love finding solutions... especially relatively low tech ones.

Here is my girl working hard to help knead the dough...


this is what the loaves look like after rising and being brushed with an egg wash...


I forgot to take a picture of the finished loaves but here is a picture of last years crop... 


I will share the recipe for this bread another day :) 

Monday, April 14, 2014

Meal plan 4/13 - 4/19/2014

    Often when I talk with people about meal planning their first reaction is "oh I could never do that!" Or "What if something comes up?" I say Sure you can and if something comes up roll with it. Last week was a perfect example for me. Sunday I was just plain wiped out so we ordered pizza and another night I had run out of an ingredient I needed so I swapped a recipe from another night. If I remember right I swapped dinner on Tuesday and Thursday. It was an easy fix and no stress. Meal planning does take a bit of forethought but in the end it has reduced my daily stress level. I started by planning out a few weeks at a time and now I try to sit down at least once a week and plan for about 2 weeks out. As we come into warmer weather I try to always have burgers, hot dogs or brats (paired with a nice salad of course) on hand for a quick grill option if we feel like being outside or I just want a quick easy dinner.

Here is my list for this week...
Sunday - Cheesy Potato soup W / ham
Monday - Kielbasa W / onions and bell peppers
Tuesday - Chili W/ Cornbread (Chili is from the Freezer)

Wednesday -  Roasted Chicken (in the Crockpot)
Thursday -  Mexican Chicken Salad Inspired buy this recipe
Friday - Crockpot steak fajitas
Saturday -  Pizza, We will be eating out since we will be at a family outing.

Tuesday, April 8, 2014

Steel cut oats... AKA my favorite breakfast at the moment :)

If you like oatmeal at all I think you will like steel cut oats. They are really good for you and I like the bit of "chew" in the texture.

Honestly I had not even heard of "steel cut oats"until about a year ago. Luckily they are easy to find in most grocery stores in the same area of the store where you find your regular oatmeal.

There are a few different ways to cook them (none quick) but its worth it since its mostly waiting time no real "work" is involved.

I made this yesterday morning...


I know it's hard to see the oats since I covered it with fruit but it's under there :)

I made a single serving by following the directions on the package. It took about 45minutes to cook.

I added
1/2 teaspoon cinnamon
1/8 teaspoon of vanilla
1/4 cup of raisins (toward the end of cooking)

Toppings can be anything you like.Think dried fruit of your favorite nuts. Bananas and blackberries are my current favorite :)

If you want to make this for a crowd there are 2 options that I have found that work well with little effort... either cook overnight in a Crockpot or prepare the and let the oats soak in the cooking liquid over night then cook in the morning for 5-10 minutes.

Here are 2 recipes I have tried:  crockpot overnight steel cut oats

When I made this I had no apples or flax seed. It was still fine. Next time I will add an exrtra 1/2 teaspoon of cinnamon and at least 2 1/2 teaspoons of vanilla. ( if you are using a really good quality vanilla I would use a bit less)   *TIP* I am not a huge fan of Crock pot liners but for this it would be worth it! Mine was slightly overcooked and not the most fun to clean. Oh... it might not have been so bad if I had remembered to oil my crock :)

Recipe 2... overnight steel cut oats  It's Crazy good! Not to mention simple!


Monday, April 7, 2014

Quesadillas

One night 2 weeks ago Quesadillas were on our meal plan. I had not made them in a while so I was really happy to run across this recipe hearty black bean quesadillas

Many thanks to Beth over at budget bytes for the inspiration!

I changed it up just a bit but my version was definitely inspired by this recipe. My changes are in Bold Italics


This was before I added the cheese and cilantro. I was lucky to remember to take a photo at all :)


Ingredients
  •  1/2 pound of cooked ground beef (crumbled) Because if I do not add a bit of meat my hubby will give me a funny look :)
  • 1 (15 oz.) can black beans
  • 1 cup frozen corn kernels (1 can of Corn Kernels. I use the Aldi Brand)
  • ½ small red onion
  • 1 clove garlic
  • ¼ bunch fresh cilantro (I only had dried)
  • 2 cups shredded cheese
  • 1 batch taco seasoning
  • 10 taco sized tortilla  (I used yellow corn tortillas)
  • Optional toppings... Jalapeños, sour cream, tomatoes, lettuce, guacamole, avocado
The original authors Instructions:
  1. Drain the can of beans and rinse lightly. Place the beans in a large bowl along with the corn (no need to thaw).
  2. Rinse the cilantro, remove the leaves, and chop roughly. Dice the onion and mince the garlic. Add the cilantro, onion, garlic, and shredded cheese to the bowl with the beans and corn. Lastly, mix up a batch of taco seasoning and add to the bowl. Stir everything until evenly mixed.
  3. Place a half cup of the filling on one side of each tortilla and fold over. Cook in a skillet on both sides over medium heat until brown and crispy and the cheesy filling has melted.
  4. To freeze the quesadillas, simply fill each one and place on a baking sheet lined with parchment paper. Place in the freezer for one hour to solidify the quesadillas and then transfer to a freezer bag. To reheat either microwave (for a soft quesadilla) or cook in a skillet on low heat (make sure to use low heat so that the filling has time to thaw and melt before the outside burns).
What I did:
    I cooked the ground beef in a medium fry pan. Turned off the heat then added the rest of the ingredients (except the tortillas and toppings).
    Heat a large skillet (I used my double burner griddle) lightly coat the pan with oil (I used my sprayer but a pastry brush would also work to get a light coating). Place tortilla on pan place 1/3 cup of filling off to one side of the tortilla. Add a bit of extra cheese if you like. Fold over tortilla. Hold in place for a minute until tortilla has set. Cook until crisp on each side and filling is warmed through.
 
This fed all 4 of us VERY well!  I had a good amount of filling leftover so I made up burritos for my hubby for work lunches.

My whole family Loved these and were happy campers!

Saturday, April 5, 2014

Meal Plan 4/6 - 4/12 2014

Generally I only post dinners but I am making breakfast on Sunday as well.
We are having cinnamon rolls sausage and fresh fruit.  More on this Cinnamon roll recipe another day but know that it is FANTASTIC!


For general breakfasts this week I made 2 loaves of cinnamon raisin oatmeal bread

Sunday -    taco pasta bake
Monday - Chicken cordon-bleu casserole see my post Here   
Tuesday -  barbecue beef and cheesy potato casserole   New!
Wednesday -  Oven Fried Chicken   (family favorite)
Thursday - Tortellini Bites
Friday - Grilled Steak
Saturday - Frozen Pizza  (hubby is in charge as I will be gone scrapbooking)

Tuesday, April 1, 2014

Home-made Pork breakfast sausage & Gravy recipe

Last spring I purchased a whole Pig from a local farmer. Part of my meat order included an abundance of ground pork. I had already been on the search for sausage recipes and this was a great opportunity to start experimenting.

Here are some recipes I found on line... My changes are in bold Italics

This first recipe is the one I used for the biscuits and gravy recipe I mentioned last week. My family really liked it. I can not give a full review as I was under the weather and not in the mood to eat.

homemade breakfast sausage patties
(original recipe link above)

Ingredients

    ½ teaspoon garlic powder
    ¼ teaspoon onion powder
    ½ teaspoon ground thyme
    ½ teaspoon crushed fennel seeds (I omitted because I did not have them)
    3 teaspoons rubbed sage
    1 teaspoon kosher salt
    ½ teaspoon crushed red pepper flakes (I substituted chili powder)
    pinch cloves
    grating of fresh nutmeg
    1 pound ground pork
    1 tablespoon maple syrup (I omitted due to wanting a savory sausage)
    2 teaspoons extra-virgin olive oil, plus 1 tablespoon extra for frying

Instructions

    In a small bowl, whisk together the garlic powder, onion powder, thyme, fennel, sage, salt, red pepper flakes, cloves and nutmeg.
    Place the pork in another bowl; drizzle over the syrup and 2 teaspoons of olive oil. Add the spices to the pork and mix to combine. Rinse your hands (having wet hands makes shaping the patties easier) and form the meat into patties, about 2-1/2 inches round.
    In a nonstick skillet, heat the remaining tablespoon of olive oil over medium-high heat. Add the patties and cook until the patties are completely cooked through and golden brown, about 4 to 5 minutes per side. Drain the patties on paper towels and serve.


Homemade Breakfast Sausage
Original recipe link   Here

This second recipe I have used multiple times. I have adapted it many ways depending on the flavor profile I was wanting. Savory vs a sweet or mild vs spicy. It is always a hit :)

1 lb. ground pork
1 Tbs. fresh thyme, finely chopped ( I used dried)
1 Tbs. fresh cilantro, finely chopped
( I used dried) 
1 Tbs. brown sugar
1 Tbs. dijon mustard
1/2 Tbs. olive oil
1/2 Tbs. kosher salt
1 tsp. ancho chili powder
(I omitted)

 1 tsp. cayenne pepper ( I substituted Chili powder)
1 tsp. ground black pepper
1/2 tsp. grated nutmeg

Combine all ingredients in a bowl and mix thoroughly. Form into eight 2" wide, 1/2" thick patties


Back to Basics Mom's review:  
This is super good!
First I did not use ancho chili powder or Cayenne but just 1 tsp of regular chili powder.
I also did some without the brown sugar and it tasted a lot like Jimmy dean. 

Gravy Recipe for Biscuits n Gravy Printable here
3 Tablespoons butter
3 Tablespoons of flour
2 Cups of Milk
Salt and Pepper

In a Medium sauce pan melt butter. Add Flour and let simmer for a minute or so.Slowly add milk whisking as you pour. Add salt and pepper to taste. Add cooked ground sausage. Bring to a boil and let thicken to desired consistency whisking from time to time.

Do NOT walk away from this for too long as it can burn!  

Serve over your favorite Biscuits...


Wednesday, March 26, 2014

Biscuits-N-Gravy

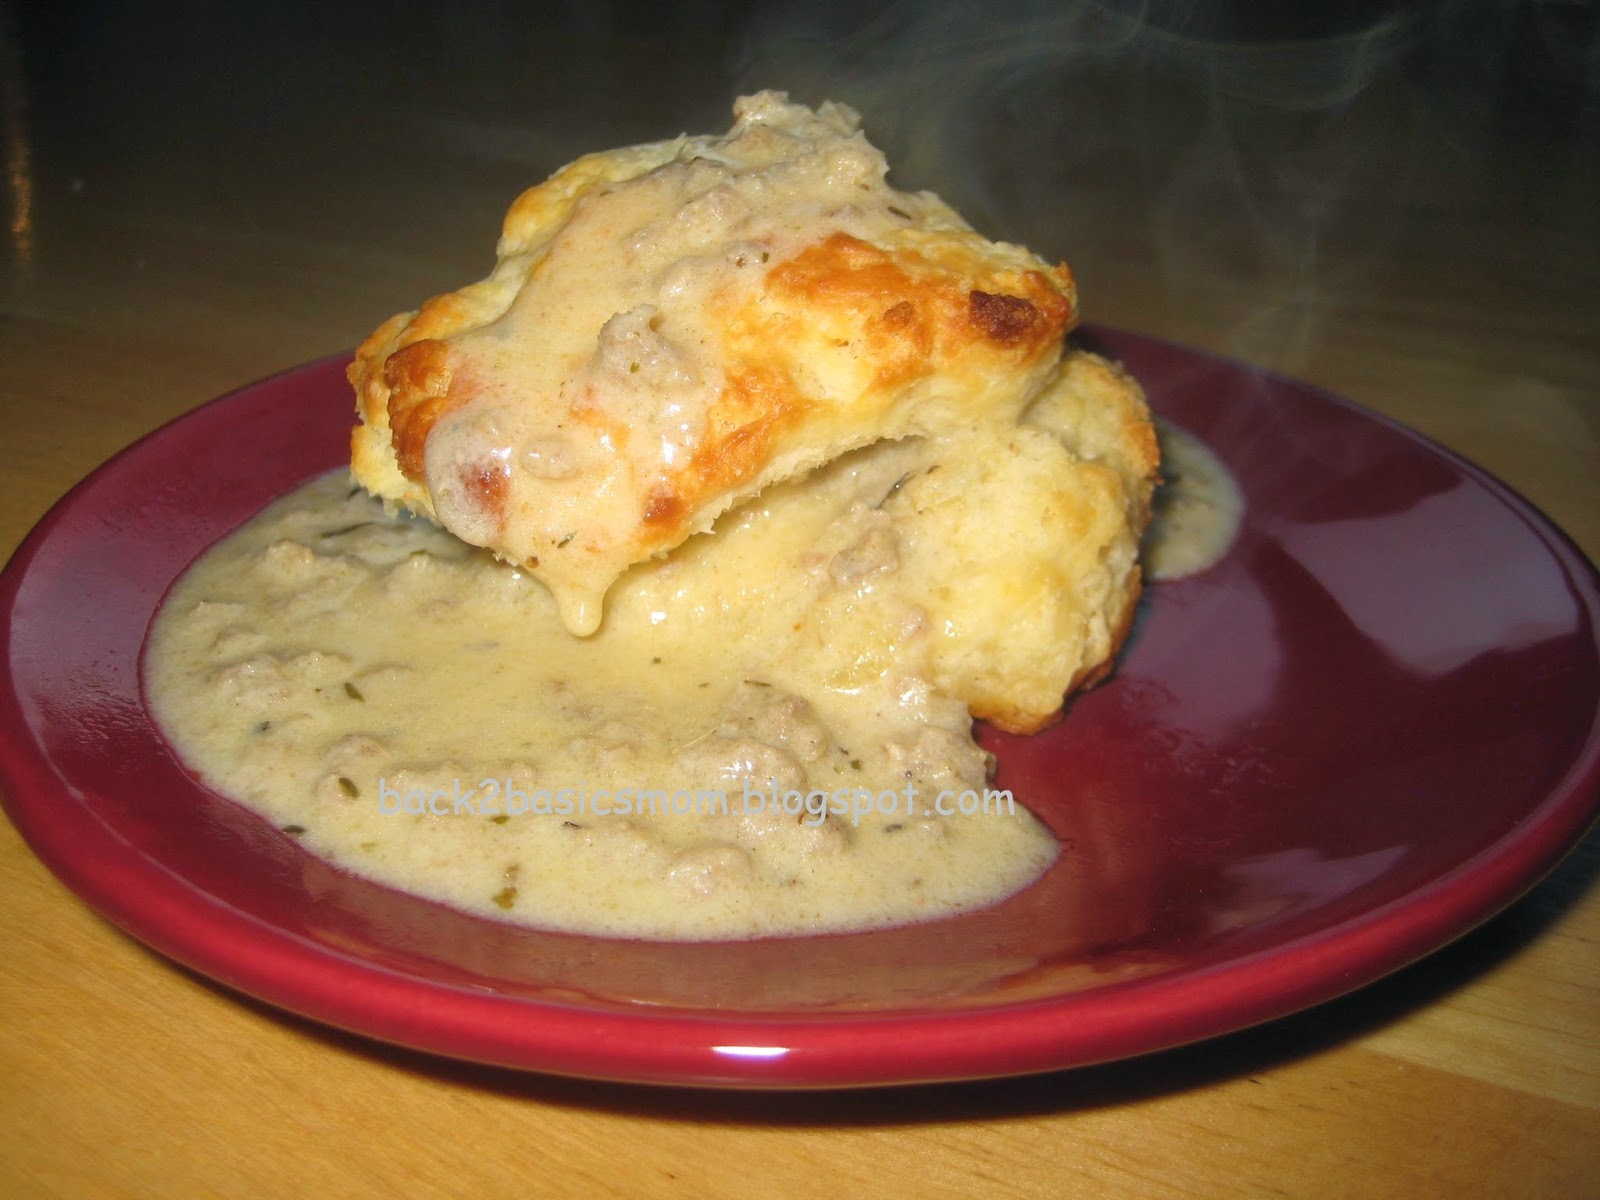
I discovered the joys of Biscuits n gravy when my now Hubby and I first moved in together. I had never had it nor even heard of it before then. He requested it one morning and I said "what's that?" so I did some research and started making canned biscuits and a gravy similar to what I make now with a purchased savory sausage. We enjoyed it but over the evolution of my scratch cooking I have discovered a better way (at least better for us).

I discovered this recipe on allrecipes.com a few years ago. I love it because it's pretty easy and my family loves it because they are YUMMY!
This is a double batch...
My Printable

Here is how I make them...

Ingredients:
2 cups of self rising flour (how to make your own below!)
1/2 cup of butter
2/3 cup of buttermilk (I'll talk about substitutions below)

1st preheat your oven to 450 degrees

Measure out your flour into a decent sized mixing bowl. Cutting in the flour can make a mess! I slice the butter while it's super cold into thin slices then roll it around to coat it with flour (a tip I learned from Alton Brown on one of his pie crust episodes)

Using your favorite pastry blender (or 2 butter knives) "cut in" the butter. You could also do this in a food processor and just pulse a few times being careful not to overwork the dough. (If my processor was full capacity I would definitely try it!)

 When the mixture looks grainy and no piece of butter is larger than a pea you are ready to add your liquid.

You may need a bit more liquid than the recipe calls for, just add cold water a tablespoon at a time. You want to work the dough as little as possible but all the flour should be incorporated and the dough should be a bit sticky.

I then use my largest scoop (about a 1/4 cup size)  to portion out my biscuits onto my large baking stone (pan must have sides as the butter will ooze when cooking!) If using a metal pan grease it or use Parchment paper!

This is a double batch
After They are all portioned out I press them down a bit. I dip my fingertimp in water so they will not stick :)


Bake for about 15 minutes or until golden...

Putz factor... 3 because of cutting in the butter.


 OK heres the scoop on Self Rising Flour... it is SUPER easy to make your own! No need to purchase and store yet another baking supply!

for 1 cup of self rising flour you need:

1 cup of all purpose flour with 2 teaspoons removed
1 1/2 Teaspoon Baking Powder
1/2 teaspoon Salt

whisk to blend... That's it!


Buttermilk Substitutions...

Here is my favorite substitution. I use it in pancakes, these biscuits and any recipe that calls for buttermilk. I also often transfer it to an airtight container as it is prone to absorbing moisture. When it gets lumpy it does not work as well.

Buttermilk powder
I measure this out and add it in with the dry ingredients then just add the amount of water that you would have used if you'd had buttermilk.

Another substitution is to add a bit of vinegar or lemon juice to milk.  find some good tips here...


So, next time you need some biscuits give these a try!

Gravy /Sausage recipe coming soon!


FYI as of the date I posted this I do not get any compensation for posting links to products or other website links.


Sunday, March 23, 2014

Meal plan March 23rd - March 29th 2014

We will be trying a bunch of "new to us" recipes over the next few weeks. I have added links to the original sources so those awesome bloggers can  get the credit!I probably will alter many of the recipes a bit to suit my family's taste

The end of the week will be busy with a band concert for the girl and I am out of town Friday evening - late Saturday afternoon so the family will be eating Freezer meals, Yay for them and no worries for me! :)    Side note, I'm so happy to be spending some relax / scrapping time with 2 of my favorite gal pals! ;) Wahoo!
 
Sunday - Meatloaf  See my post here for details 
Monday - Cheesy Chicken and Rice casserole NEWSee recipe here

Tuesday - Baked Pork Chops NEW!   see recipe here
Wednesday - Teriyaki Chicken (in the Crock Pot) NEW!  See recipe here
Thursday - Quesadillas  NEW! See recipe here

Friday - Ravioli & Garlic bread (leftover from the freezer) See recipe here
Saturday - Sheppard's pie (Made ahead from the freezer) See my recipe here  and See my original post here  :)

Breakfast this morning was a family favorite... Biscuits and gravy... (recipes coming soon)

Tuesday, January 28, 2014

KIds can cook... Pizza!

I'm working on getting my family to share in some of the cooking duties. One of our favorite family meals is no surprise... Home made Pizza! While I was out of town recently my 12 year old took it upon herself to make dinner one night, she chose pizza. Since I was not here to experience that meal so she made it again for us about a week ago.


She did a great job and it was delicious!

here is the Pizza dough recipe

You can personalize this dough easily. You can substitute 1/2 cup whole wheat flour for the all purpose.

Add Italian seasoning or garlic powder to taste. Start with about a teaspoon.

Oh and she made this one stuffed crust! We just split Mozzarella cheese sticks (like for snacking) into 4 pieces lengthwise then place around the edge and wrap the crust around it. You can use the whole stick or just split in half if you like but we try to not go too crazy since they are a bit spendy.

Other helpful tips...
Cornmeal it great for between your dough and pan. Helps the pizza crisp and release easily.

Use a fork to poke your dough all over before putting the sauce on.It helps the dough to not bubble up like crazy during cooking.

If you like super saucy pizza bake the dough for a few minutes before adding your sauce otherwise it may be doughy.

When adding veggies add them on to of the cheese and the wettest veggies should go on top so prevent sogginess.

Regular pizza Putz factor 2.5 / Stuffed crust is about a 3-3.5

Sunday, January 26, 2014

No School... Ahhh winter in MN

So school was called off last thursday because of cold . At my house it was -22 and that was before wind chill! Gotta love Minnesota!  So what to do, admittedly I'm not a very creative mom but we did have a couple treats. Strawberry Kool-aid and strawberry Jello. I know what you are thinking , doesn't sound so special but those are things I just don't serve very often. Lunch was  Mac n cheese. Dinner was chicken pot pie and apple crumble pie for desert. All home made:)

I never make the Mac n cheese exactly the same but basically what I do is cook some pasta noodles. while they are draining heat about 1/2 cup of milk in the pot the pasta was cooked in. Add some cheese. Totally depends on what I have on hand. Today I used 5 slices (like for sandwiches), a few slices of Velveeta type cheese (aldi brand) and about 1/3 cup monetary jack shredded cheese. For a bit of flavor (thanks to a suggestion from my 12 year old daughter) I add a little garlic powder and garlic salt, about 1/8th of a tsp of each. 
When its melted and smooth add the noodles and stir  it all up. Enjoy!

Just got the call that there is no school (again) tomorrow,  due to cold temps (again) and wind chill (Again) predicted down to -50. What to do with the kids? Ahhhh I am so NOT a creative mom when it comes to keeping them occupied and away from screen time when we are cooped up in the house.

Meal plan Jan 26th - Feb1st 2014

I'm working on meal planning again for many reasons...
1. My kids have after school activities 4 days a week
2. I'm working part time (which I love and am grateful for!)
3. I want to use my crock pot more due to the fact that my oven and stove are propane and the price of propane has skyrocketed here in the Midwest.

Sunday: Hungarian Goulash
Monday: Bacon and Cheese Chicken
Tuesday: Steak fajitas
Wednesday: Potato soup
Thursday: Tater tot hot dish (it's a MN thing!)
Friday: Sweet Garlic Chicken ( NEW! I saw this allover FB and want to try it!)
Saturday: Ravioli with Italian beef

All these recipes will be made in the Crockpot!

Here is the Steak Fajita recipe :)  Print

Ingredients:
1/2 cup salsa
1 clove garlic, minced
1 tablespoon fresh lime juice
1 teaspoon freshly ground black pepper
1/2 teaspoon salt
1 1/2 pound of steak, trimmed of excess fat. Flank is good I generally use tenderized round (AKA cubbed steak)
1 red bell pepper, cut into 1/4-inch strips   (you can use all green peppers to save $!)
1 yellow bell pepper, cut into 1/4-inch strips
1 green bell pepper, cut into 1/4-inch strips
1 large onion, thinly sliced
2 teaspoons minced fresh cilantro for garnish (dried is OK too)

Directions:
In a small mixing bowl, combine salsa, garlic, lime juice, salt and pepper. Place flank steak in a 4-5 quart slow cooker and pour sauce over steak, making sure to coat steak well. Add bell peppers and onion. Cover and cook on low heat setting 6 to 8 hours (OR on high heat setting 3 to 4 hours).

Remove steak and vegetables from juice and let steak stand 10 minutes before slicing. Slice steak thinly across grain of meat. Serve with peppers and onion. Garnish with fresh cilantro and your favorite toppings.
*TIPS*
If you want more heat use a spicier salsa or add diced Jalapeños.

This is great with guacamole or a Mango Salsa!
For more tender meat place your beef on the counter for about an hour before adding to crock pot. I'm not sure why this works but it does for me.

I highly recommend cooking this on Low Vs. High!


My favorite Guacamole (that my husband will eat!)

1 ripe avocado mashed
1-2 Tablespoons finely diced red onion
1 Teaspoon lime juice or to taste
salt to taste
cilantro to taste 1/2 Teaspoon dried or 1 teaspoon diced fresh
1 roma tomato diced (optional)  I do not add this when the Hubby is sharing :)
1 diced Jalapeño (optional) I do not normally add this for myself.

If a recipe does not have a link either it is new, I do not have it typed up yet or its a recipe i never do the same way twice :) It's just how I roll...

Saturday, January 11, 2014

Cinnamon Raisin Oatmeal Bread

* UPDATE *  I have made this 4-5 times now and you really do need to weigh the ingredients! The results are MUCH better!


Isn't it funny what can result from looking up info online? I was looking for tips on freezing bread dough and I ran across this awesome bread cooking forum called The fresh loaf. There I found wonderful advice, tips and yup recipes!

I have also been thinking it would be nice to have something easy and warm for breakfasts and something I could take to work that was also a bit healthier than a bagel. This bread looked like it would fit the bill by still being a bit indulgent but also being an OK food choice.

Looking at the recipe the first time I admit I was a bit apprehensive. It looked complicated. I was pleasantly surprised that while it took a bit more time than my favorite sandwich bread it was not too bad at all (at least as far as bread is concerned)

Here is a link directly to the recipe cinnamon raisin oatmeal bread

It is helpful to have a kitchen scale. Any serious baker will tell you it is better to weigh ingredients for baking. (I invested in a scale over the holidays when Aldi had them for $9.99).

Do not be like me... I did not read the directions fully and did not measure the water I soaked my oats in OOPS!!! Luckily it worked out OK... Phew...

Also after reading other peoples experience I only did 2 rise cycles. My first rise took some time. A few hours. Then I kneaded the dough and made it into 2 loaves. Yes the recipe calls for making 3 but I have larger stoneware loaf pans so I was pretty sure it would be fine. If you are using Pyrex bread pans definitely do 3! Or make rolls as another poster on the forum did. I will do that next time to try it out!

Next time I make this I will also slightly warm the water I use to soak my Oats. I think this may have hindered my rise a bit. Although a slower rise can create more flavor.  I was also a bit short on raisins but It was still fine.More would definitely be better though!

If you have NO experience with dough this would probably not be my choice for your first bread endeavor. It does take a bit of knowledge and experience to get a "feel" for if a dough is going to work out. If you have mixed and kneaded at least a few loaves successfully you should be fine :)

If you decide to give this a try hopefully this is what you will end up with... Enjoy!

Mmmmmm... Lots of melty butter to make it extra yummy!