I am on a mission... to create, to inspire, to learn, to educate, to save, to grow, to be better... Join me :)
Showing posts with label butter. Show all posts

Wednesday, March 26, 2014

Biscuits-N-Gravy

I discovered the joys of Biscuits n gravy when my now Hubby and I first moved in together. I had never had it nor even heard of it before then. He requested it one morning and I said "what's that?" so I did some research and started making canned biscuits and a gravy similar to what I make now with a purchased savory sausage. We enjoyed it but over the evolution of my scratch cooking I have discovered a better way (at least better for us).

I discovered this recipe on allrecipes.com a few years ago. I love it because it's pretty easy and my family loves it because they are YUMMY!
This is a double batch...
My Printable

Here is how I make them...

Ingredients:
2 cups of self rising flour (how to make your own below!)
1/2 cup of butter
2/3 cup of buttermilk (I'll talk about substitutions below)

1st preheat your oven to 450 degrees

Measure out your flour into a decent sized mixing bowl. Cutting in the flour can make a mess! I slice the butter while it's super cold into thin slices then roll it around to coat it with flour (a tip I learned from Alton Brown on one of his pie crust episodes)

Using your favorite pastry blender (or 2 butter knives) "cut in" the butter. You could also do this in a food processor and just pulse a few times being careful not to overwork the dough. (If my processor was full capacity I would definitely try it!)

 When the mixture looks grainy and no piece of butter is larger than a pea you are ready to add your liquid.

You may need a bit more liquid than the recipe calls for, just add cold water a tablespoon at a time. You want to work the dough as little as possible but all the flour should be incorporated and the dough should be a bit sticky.

I then use my largest scoop (about a 1/4 cup size)  to portion out my biscuits onto my large baking stone (pan must have sides as the butter will ooze when cooking!) If using a metal pan grease it or use Parchment paper!

This is a double batch
After They are all portioned out I press them down a bit. I dip my fingertimp in water so they will not stick :)


Bake for about 15 minutes or until golden...

Putz factor... 3 because of cutting in the butter.


 OK heres the scoop on Self Rising Flour... it is SUPER easy to make your own! No need to purchase and store yet another baking supply!

for 1 cup of self rising flour you need:

1 cup of all purpose flour with 2 teaspoons removed
1 1/2 Teaspoon Baking Powder
1/2 teaspoon Salt

whisk to blend... That's it!


Buttermilk Substitutions...

Here is my favorite substitution. I use it in pancakes, these biscuits and any recipe that calls for buttermilk. I also often transfer it to an airtight container as it is prone to absorbing moisture. When it gets lumpy it does not work as well.

Buttermilk powder
I measure this out and add it in with the dry ingredients then just add the amount of water that you would have used if you'd had buttermilk.

Another substitution is to add a bit of vinegar or lemon juice to milk.  find some good tips here...


So, next time you need some biscuits give these a try!

Gravy /Sausage recipe coming soon!


FYI as of the date I posted this I do not get any compensation for posting links to products or other website links.


Wednesday, July 4, 2012

Home made butter... mmmm

So I got a ton of Heavy cream as part of a food distribution program I went to... Hmmm now what?
Then I remembered a friend telling me she made butter last time she got a bunch of cream so I said to myself OK, I can do this!

There are lots of instructions online and luckily I have my trusty KitchenAid so I knew I could handle it. Still it's a bit daunting... I mean we don't make butter we buy it right? OK I'm over it lets give it a go :)

This was my favorite tutorial that I found homemade butter from The Hungry Mouse

Here are some pictures from my adventure...
 This is what it looks like after about 10 minutes and the nice fluffy whip cream is starting to break down.


Things go pretty quickly now and it gets clumpy looking.

 Now its ready for straining...


 This is after I have strained, kneaded, and rinsed out all the buttermilk. Sorry there are no in between pictures because my hands were covered in butter :) As an extra step I put the disc of butter into some sack cloth (you could probably use cheese cloth too) and folded it over and pressed to expel any remaining buttermilk. I also did mix in a bit of salt. Probably about 1/4 of a teaspoon.


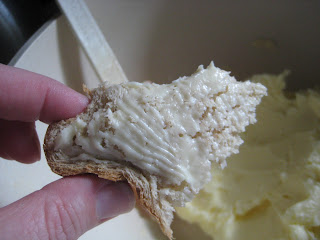
 Mmmmm...


From 1 quart of cream I got 1 3/4 cup butter and over a cup of buttermilk we will use for pancakes or baking. I measured 1 cup into my handy dandy measure all cup and have a nicely measures cylinder to go into the freezer and wait until I need some butter for baking. If the heat ever breaks I will make some muffins and cookies .

So the ingredients I used were...
1 quart of heavy cream
1/4 teaspoon salt

handy tools:
A good stand mixer
a fine mesh strainer
flour sack cloth ( cheese cloth would probably work too)