I am on a mission... to create, to inspire, to learn, to educate, to save, to grow, to be better... Join me :)
Showing posts with label Craft. Show all posts

Saturday, August 4, 2018

Craft Area Update / Upcycle / Recycle

   Hi all! If you have been following me for a while you know that I Craft in my unfinished basement. we make good use of our space down here. Hubby and I have a makeshift bedroom (walled off by heavy curtains. We have a gaming / TV area as well as laundry, wood stove and 3/4 bath.

  I have wanted to do something new with my craft storage wall for a while but did not really want to spend much money. I am hoping in the next few years to be able to move upstairs when my kids move out.

  So for the past 4 days I have been working my but off refurbishing a set of rusty, dirty shelves I grabbed free from the driveway of a neighbor. Here they are right after I got them home...


   Yup they are pretty grimy! After much scrubbing they looked a bit more like this...


   After lots of sanding and scraping I began Painting....


   I used flat white Rustoleum. After 3 cans of the spray and 1 quart of the paint (total supply cost was around $30.00) they looked like this...


  Yup I know there is a whole in the bottom of one but I'm not worried about it. 
   
   My boy helped me move them to our basement and I was ready to get started. My before looked a bit like this (I forgot to purposely get a good photo.


Now my space looks like this!


   I just LOVE it! I have a few more inches of room between this and my desk and it is much brighter. Also I can see everything better. Things are more spread out instead of being stacked behind and on top of each other! 

   Two of the shelves are anchored to the joists above but only with rope for now. Hubby Will help be do a proper job with steel strapping when I am sure this is working well. I did try to keep the heaviest items on the bottom or lower shelves and I do have blocks of wood (some are wood blocks from old wood mounted stamps!) under the corners by the legs for extra support. 

   I even finally got my desk clean!
My Storage wall is behind me as I sit here. With a busy family I like to be able to look out and see what is going on. I do not like looking at walls!

   Here is a super sped up video of my progress... 

   This project led to lots of shifting around the house. The piece I pulled out went to the opposite side of the basement to actually be used for its purpose... an Entertainment center and looks great. The cubes the basement TV was sitting on went up to the boys room to be the base for a desk. (Still working on that one... 

  If the weather had not worked out so perfectly admittedly I probably would not have pushed so fast to get this project completed. I am sooooooo glad I did!

I hope I have inspired you to try something new or repurpose items you have around you. I could have easily spent HUNDREDS of dollars on a similar project.

Thanks for stopping by!


Sunday, August 13, 2017

Galaxy Inspiration, Cake and cards...

     Hi all! As I was racking my brain recently to figure out a theme / design for my girls sweet 16 birthday cake I was inspired to try a Galaxy theme. She loves the galaxy motif so I went to pinterest. I found a few samples that inspired me and I thought I had the basic process down since I had done the process on card stock, surely fondant could not be too much different... Hmmm... yeah...  Well turns out it isn't but it is... It took LOTS of kneading and LOTS of food coloring and LOTS of patience!  In the end here is how the cake turned out...


   I'm pretty happy with it! I found some edible shipper spray at Wal Mart and used it with a stencil I tore out of paper to create the wispy look. The grainy white "comet" in the upper right corner was how I fixed and "OOPS" I also added a few constellations I could remember from our Girl Scout Star gazing outing from years ago.

    Verdict.... She really liked it!

    Now how does this translate into cardmaking you may ask... Well I wanted to try this again for some card backgrounds so I could use some of my stamps to make some cards with the night sky in the background.


    Here is the video on how I made the backgrounds...


I still have to make the cards but at least this part is done!
Here is a basic list of the supplies I used

Heat gun
Ken Oliver Colorburst watercolors
Memento Tuxedo Black ink
Stampin Up Night of Navy inkpad
Strathmore 140# watercolor Paper (Yellow pad)


Thanks so much for stopping by!
Please leave me a comment and let me know how you liked this post!

Friday, June 23, 2017

How I handle unmounted rubber stamps

Hi all! I love being able to create and craft on a budget. One way is when stamp companies offer bare rubber stamps. Meaning they have no foam backing and are not on a wood block. Below is my video on how I deal with unmounted (bare rubber) stamps.  Enjoy!

Unmounted stamps


Saturday, May 27, 2017

Get Well Shaker card...

    I had a lot of fun making this "Get Well" card for a Co Worker last week.  This person does so much for others and deserved a special card.


   I just love shaker cards and I have been experimenting with cutting out words with my Brother Scan n Cut so I made this frame out of white card stock with the words welded so it is all one piece. To make the white card stock stand out a bit more I coated it with Versamark and covered it with a holographic embossing powder. Then heated it to adhere and set the powder. I placed a piece of acetate behind the frame (I just re use packaging from other things I buy),doubled up some foam tape and cut it down the center to form narrow strips then lined the back of the frame. To cut the purple I used 2 frame dies then added the white window piece on top. I pulled an A2 card base out of my drawer (I like to have lots handy for when I'm feeling creative). I added Chunky glitter and sequins to the card base in the center then placed the window on top. I had to add the flower embellishments to fix a spot that got messed up. The Acetate got melted when I tried to fix a bit of embossing that had not set and was wiped off.  It worked out because I ended up liking the look.


Thanks! and have a great day!


Sunday, February 26, 2017

Unity Stamp Company Shopping haul...

If you follow my YouTube Channel and Instagram you will know that I just LOVE Unity stamp company.  They run great sales all the time and after a recent promotion I decided to shop... :)

I actually placed 2 orders because they were offering 2 freebies!

Here is what I got...


I did film a detailed video and that will be uploaded soon to my YouTube channel.

Thanks for stopping by!

Paulette

Thursday, August 27, 2015

Card Making fun...

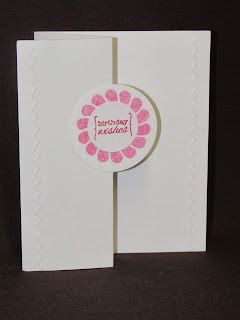
My Sister -in- law and Daughter have gotten me hooked on card making. I have been scrapbooking since my girl was little but this is a new endeavor for me. Like many of the crafty things I do I like to keep my endeavors fairly simple.

Here are some I have made in the last week or so. I did step out of my comfort zone a bit but I am really liking the results!

I use a variety of paper, stamps and embellishments in my card making. The ink is 99.9% Stampin up.  I am VERY frugal when spending money on my crafting supplies! Please look for sales and sop deals on Amazon to compare prices!


The Lighthouse stamps are from Stampendous that I got 50% off from a sale at Joann Fabrics. I stamped the design on watercolor paper. I got a good size pad on clearance at Walmart! Woohoo!!!  I used my SU ink pads and a wet brush to pick up just a bit of ink to color in the designs just enough to give some detail.


This <- is my favorite!


The butterfly card was so fun! I used my stamp pads to pick up some ink with sponges and sponged it on white card stock. Then used my SU thinlet dies to cut the butterflies. The colors are Melon mambo, Tangerine Tango and daffodil delight. The embossing folder is from Darice.


Here I used Metallic black Embossing powder on Black card stock to get this simple yet elegant look.


If you have questions about any let me know! I got most of my ideas and inspiration from Pinterest :)